Mar 152021
 

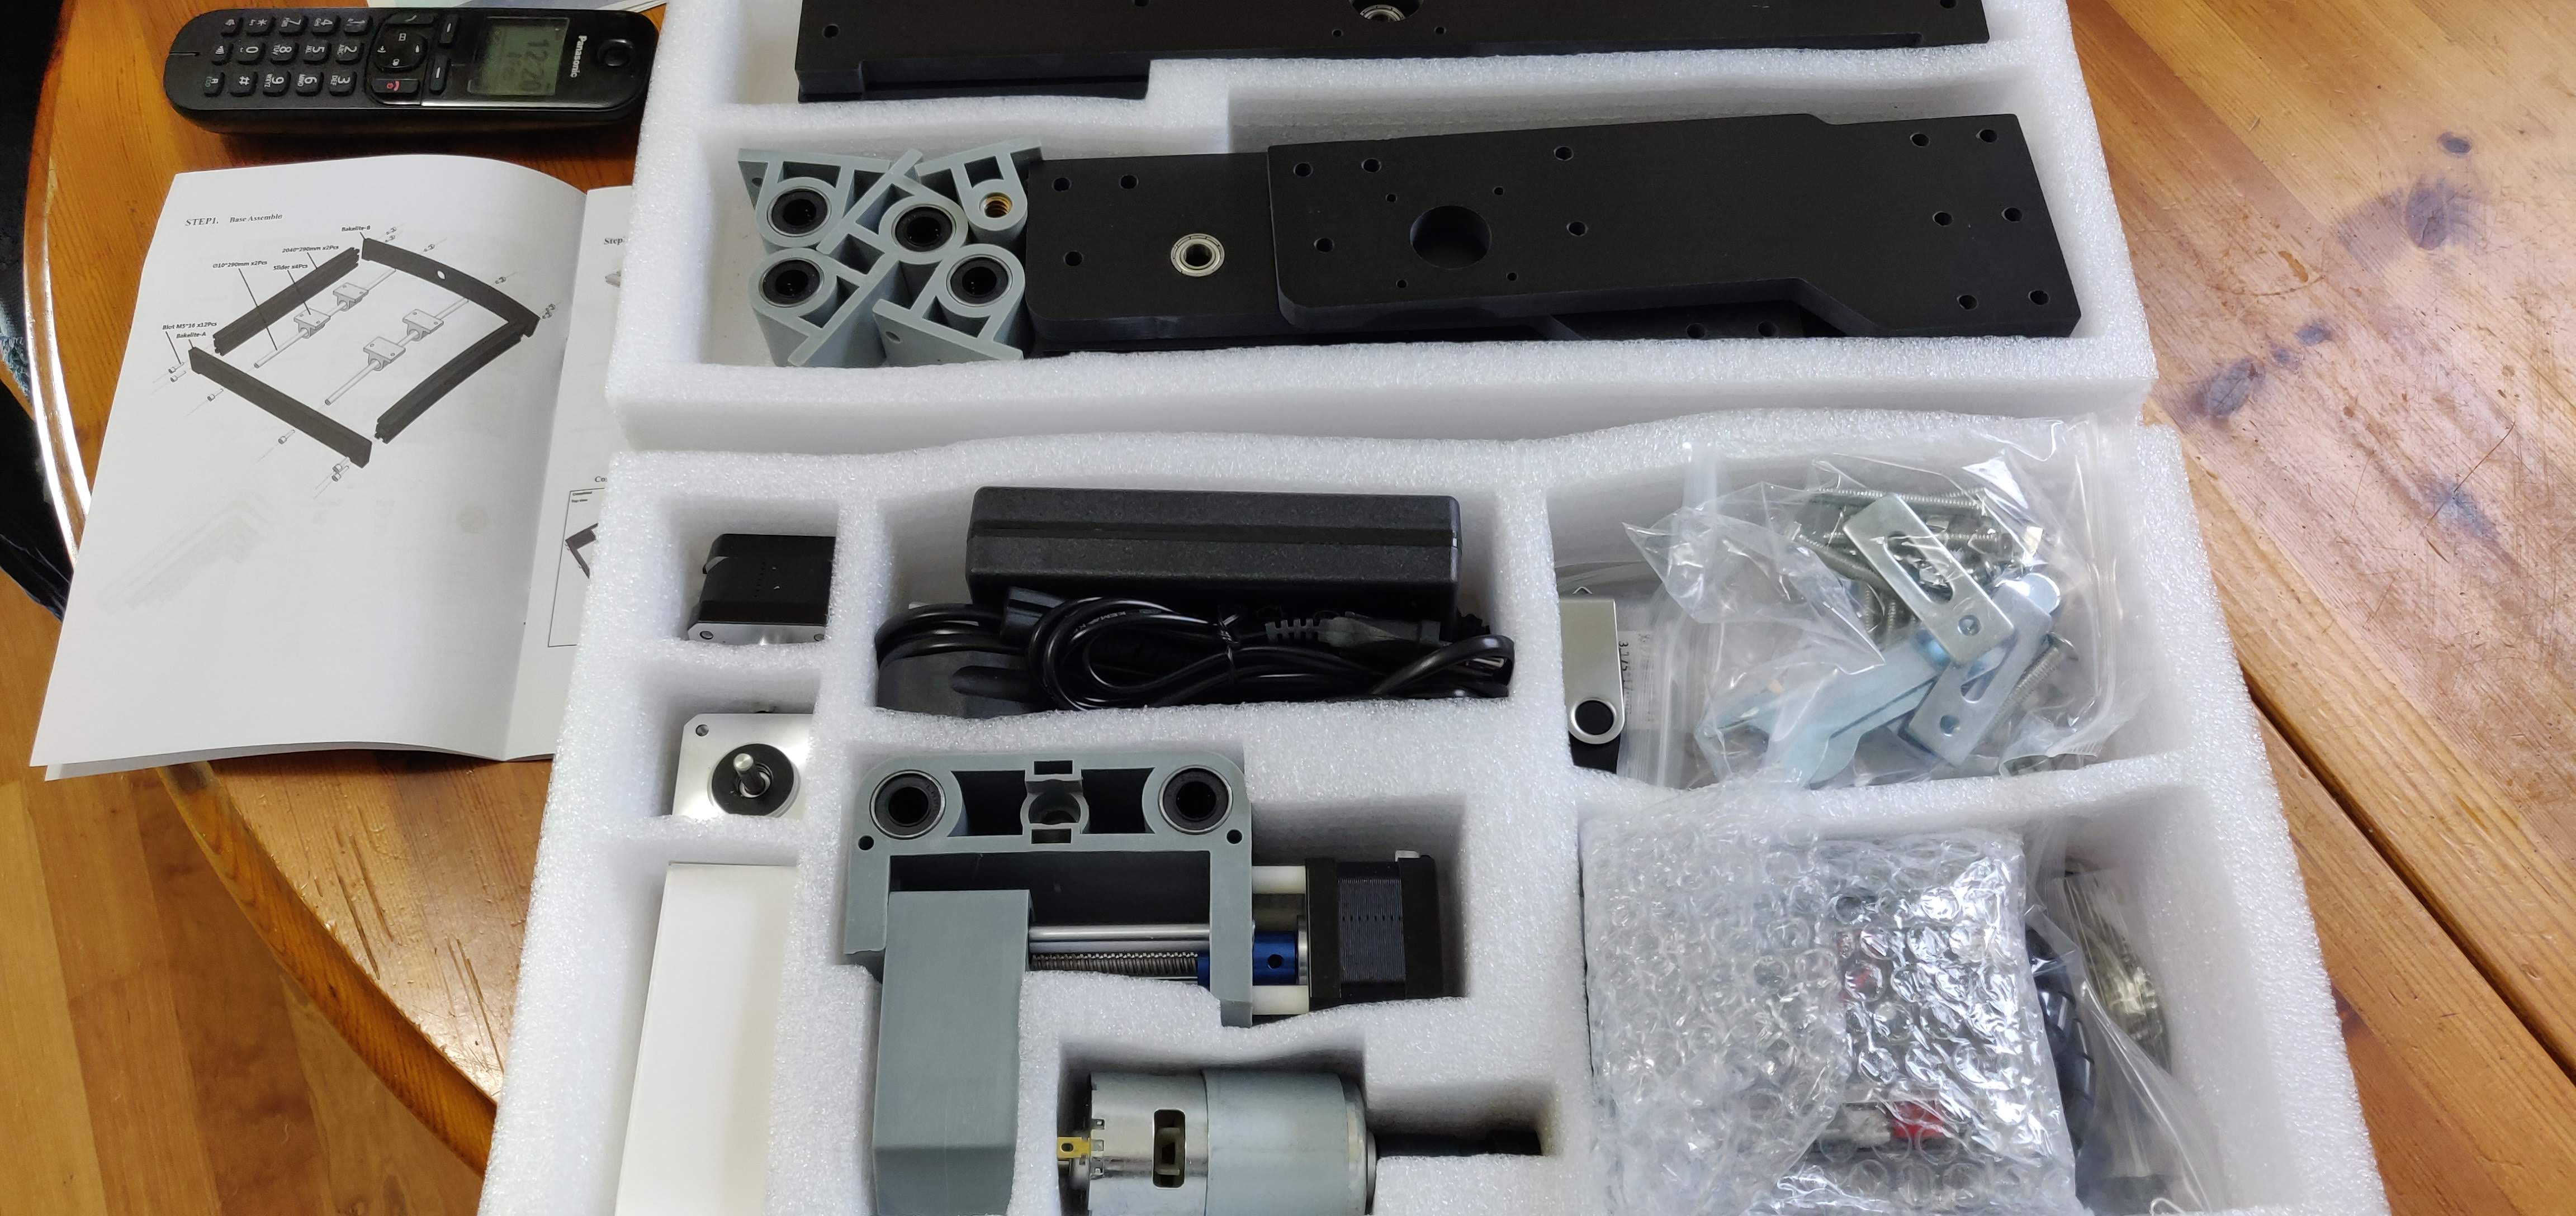
Back in Feb when the weather looked like it was going to be cold and crap, I bought a small desktop CNC router kit to assemble. I’ve had quite a lot of fun with it since then, experimenting with different materials and techniques.

3018 Pro CNC Router kit

Here’s what it looks like when built…

The motor moves left and right (x-axis), and up and down (z-axis). The aluminium table moves forward and back (y-axis)

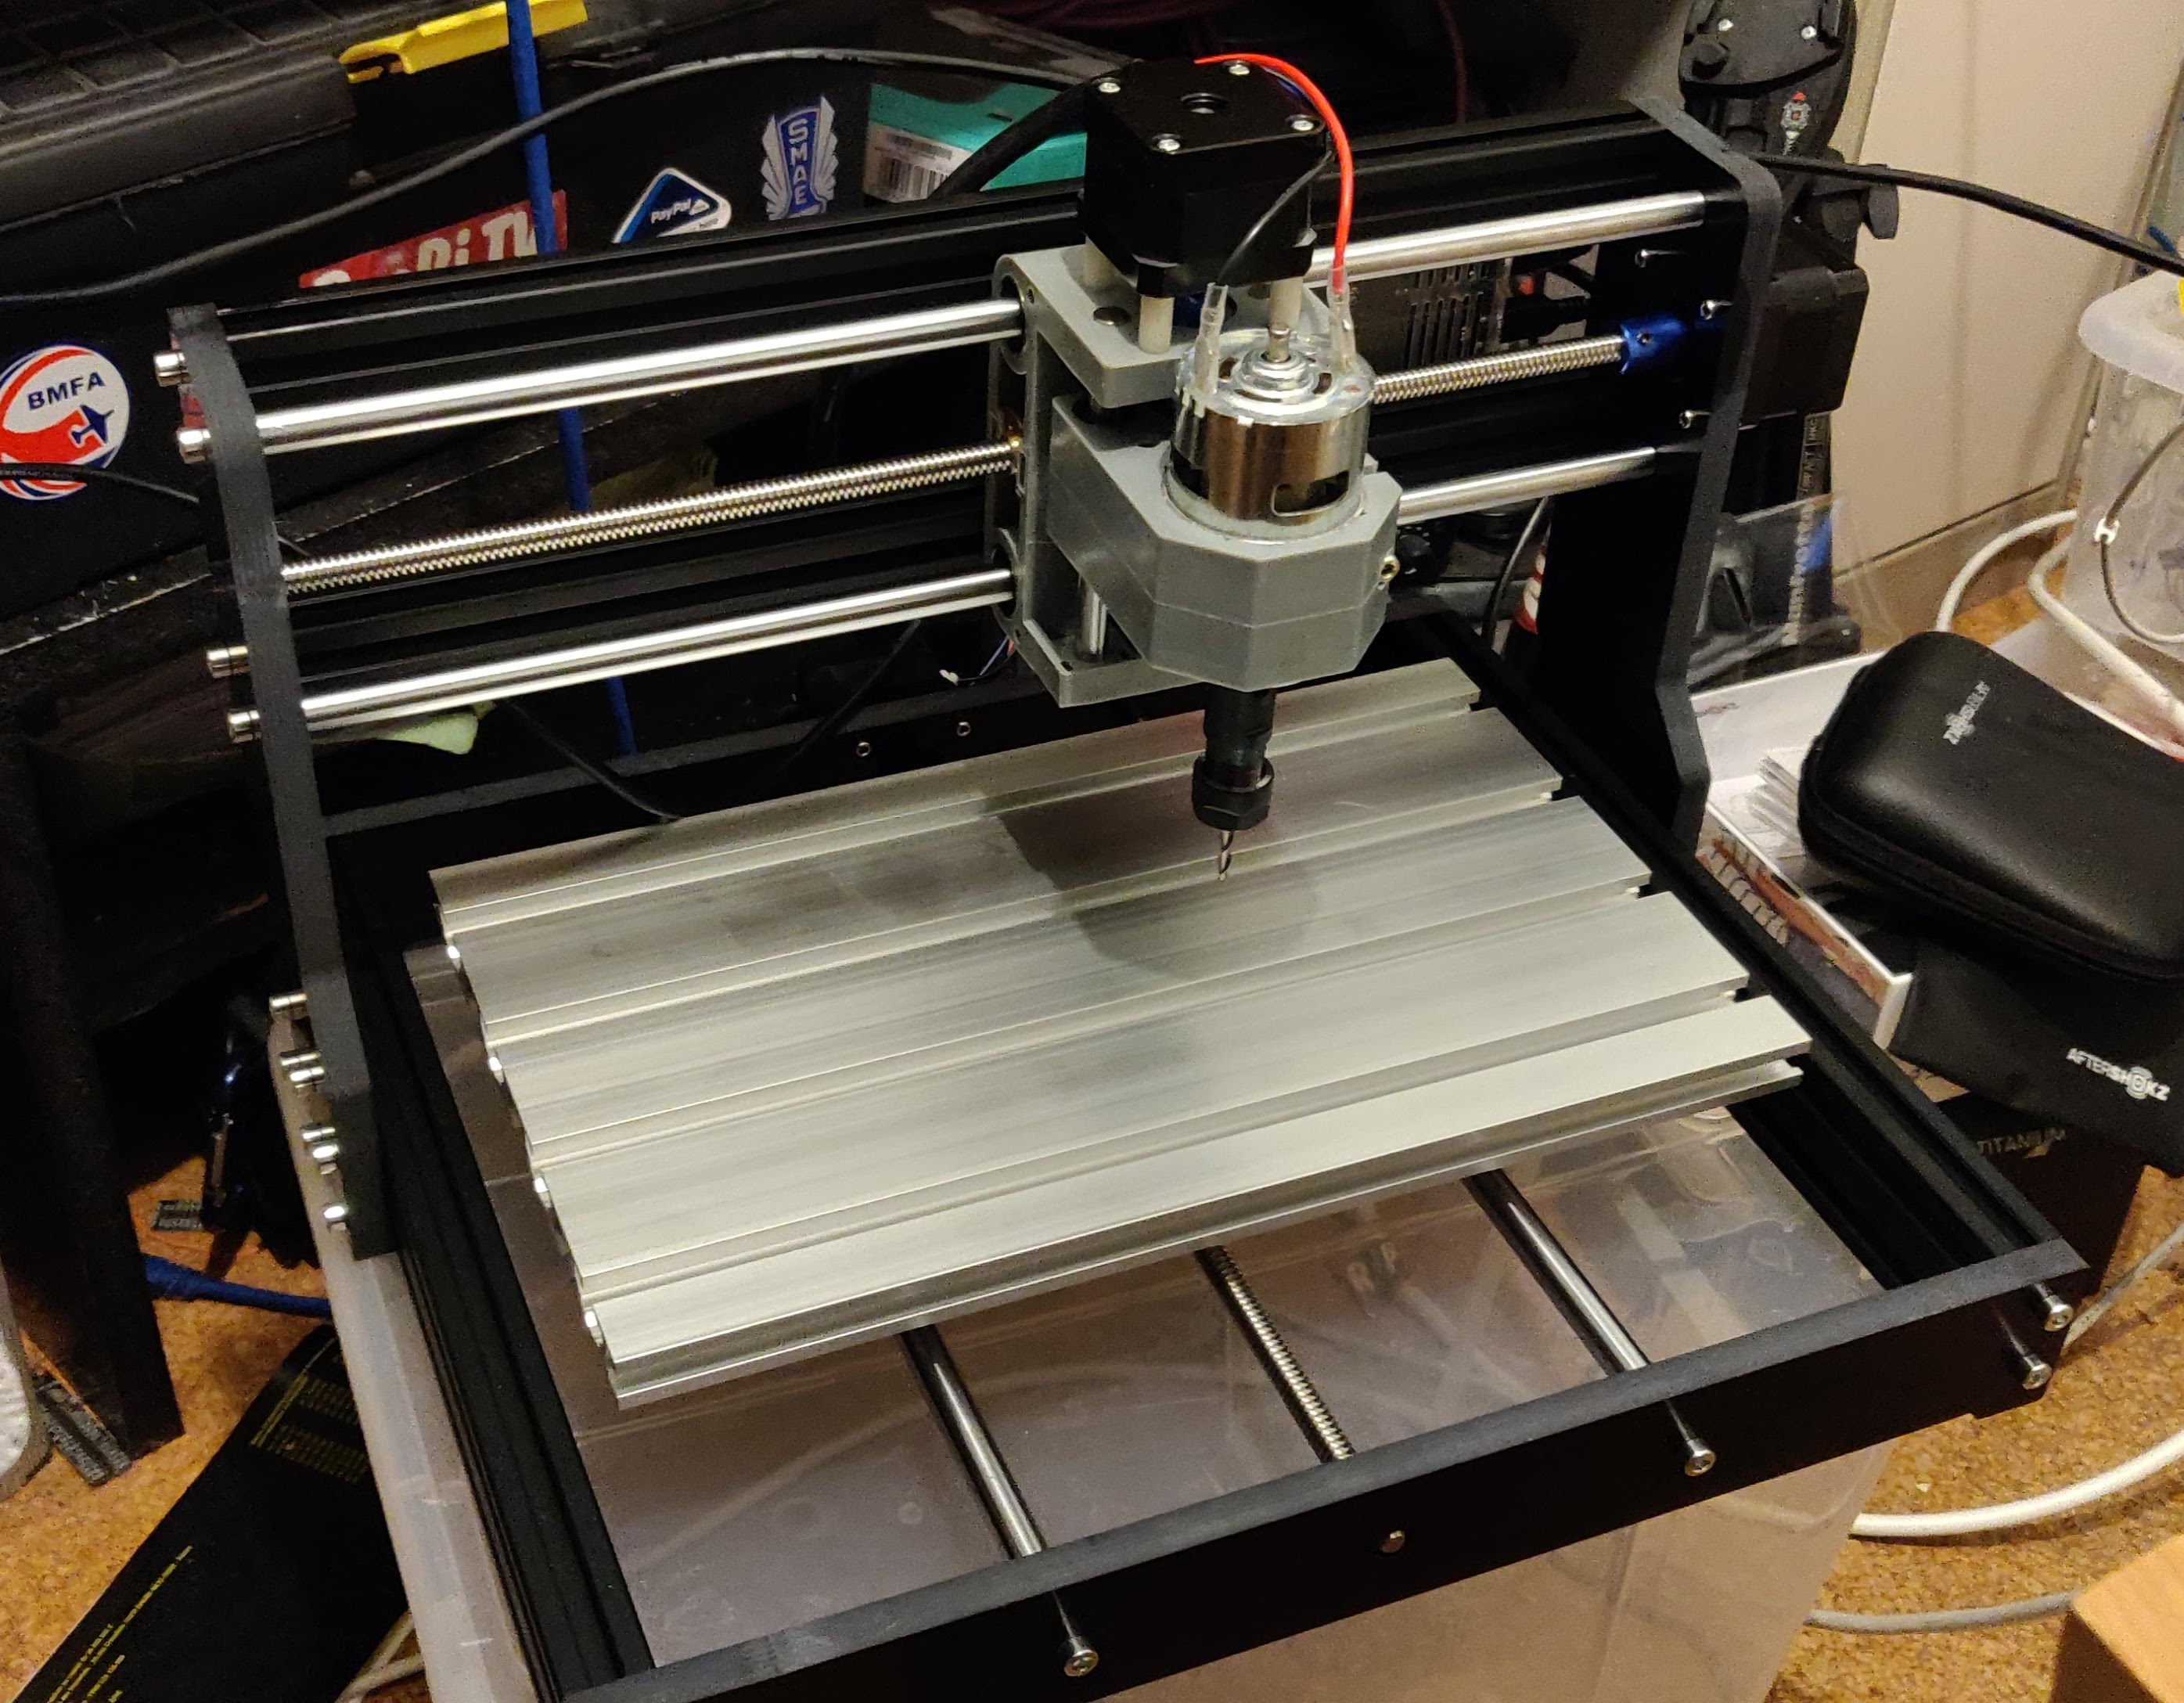
So what can it do? Well it’s basically a computer-controlled router, so it can cut, trim and engrave wood, plastics and softish metals like aluminium. Obviously it’s a ‘hobby’ machine, so not up to industrial size or speed, but it’s still pretty cool.

Some early experiments with engraving a fancy font in 3mm birch ply

Obviously all the designing is done on a computer and software translates the design files into Gcode, which controls the movements of the CNC router, hopefully making it do exactly as you want.

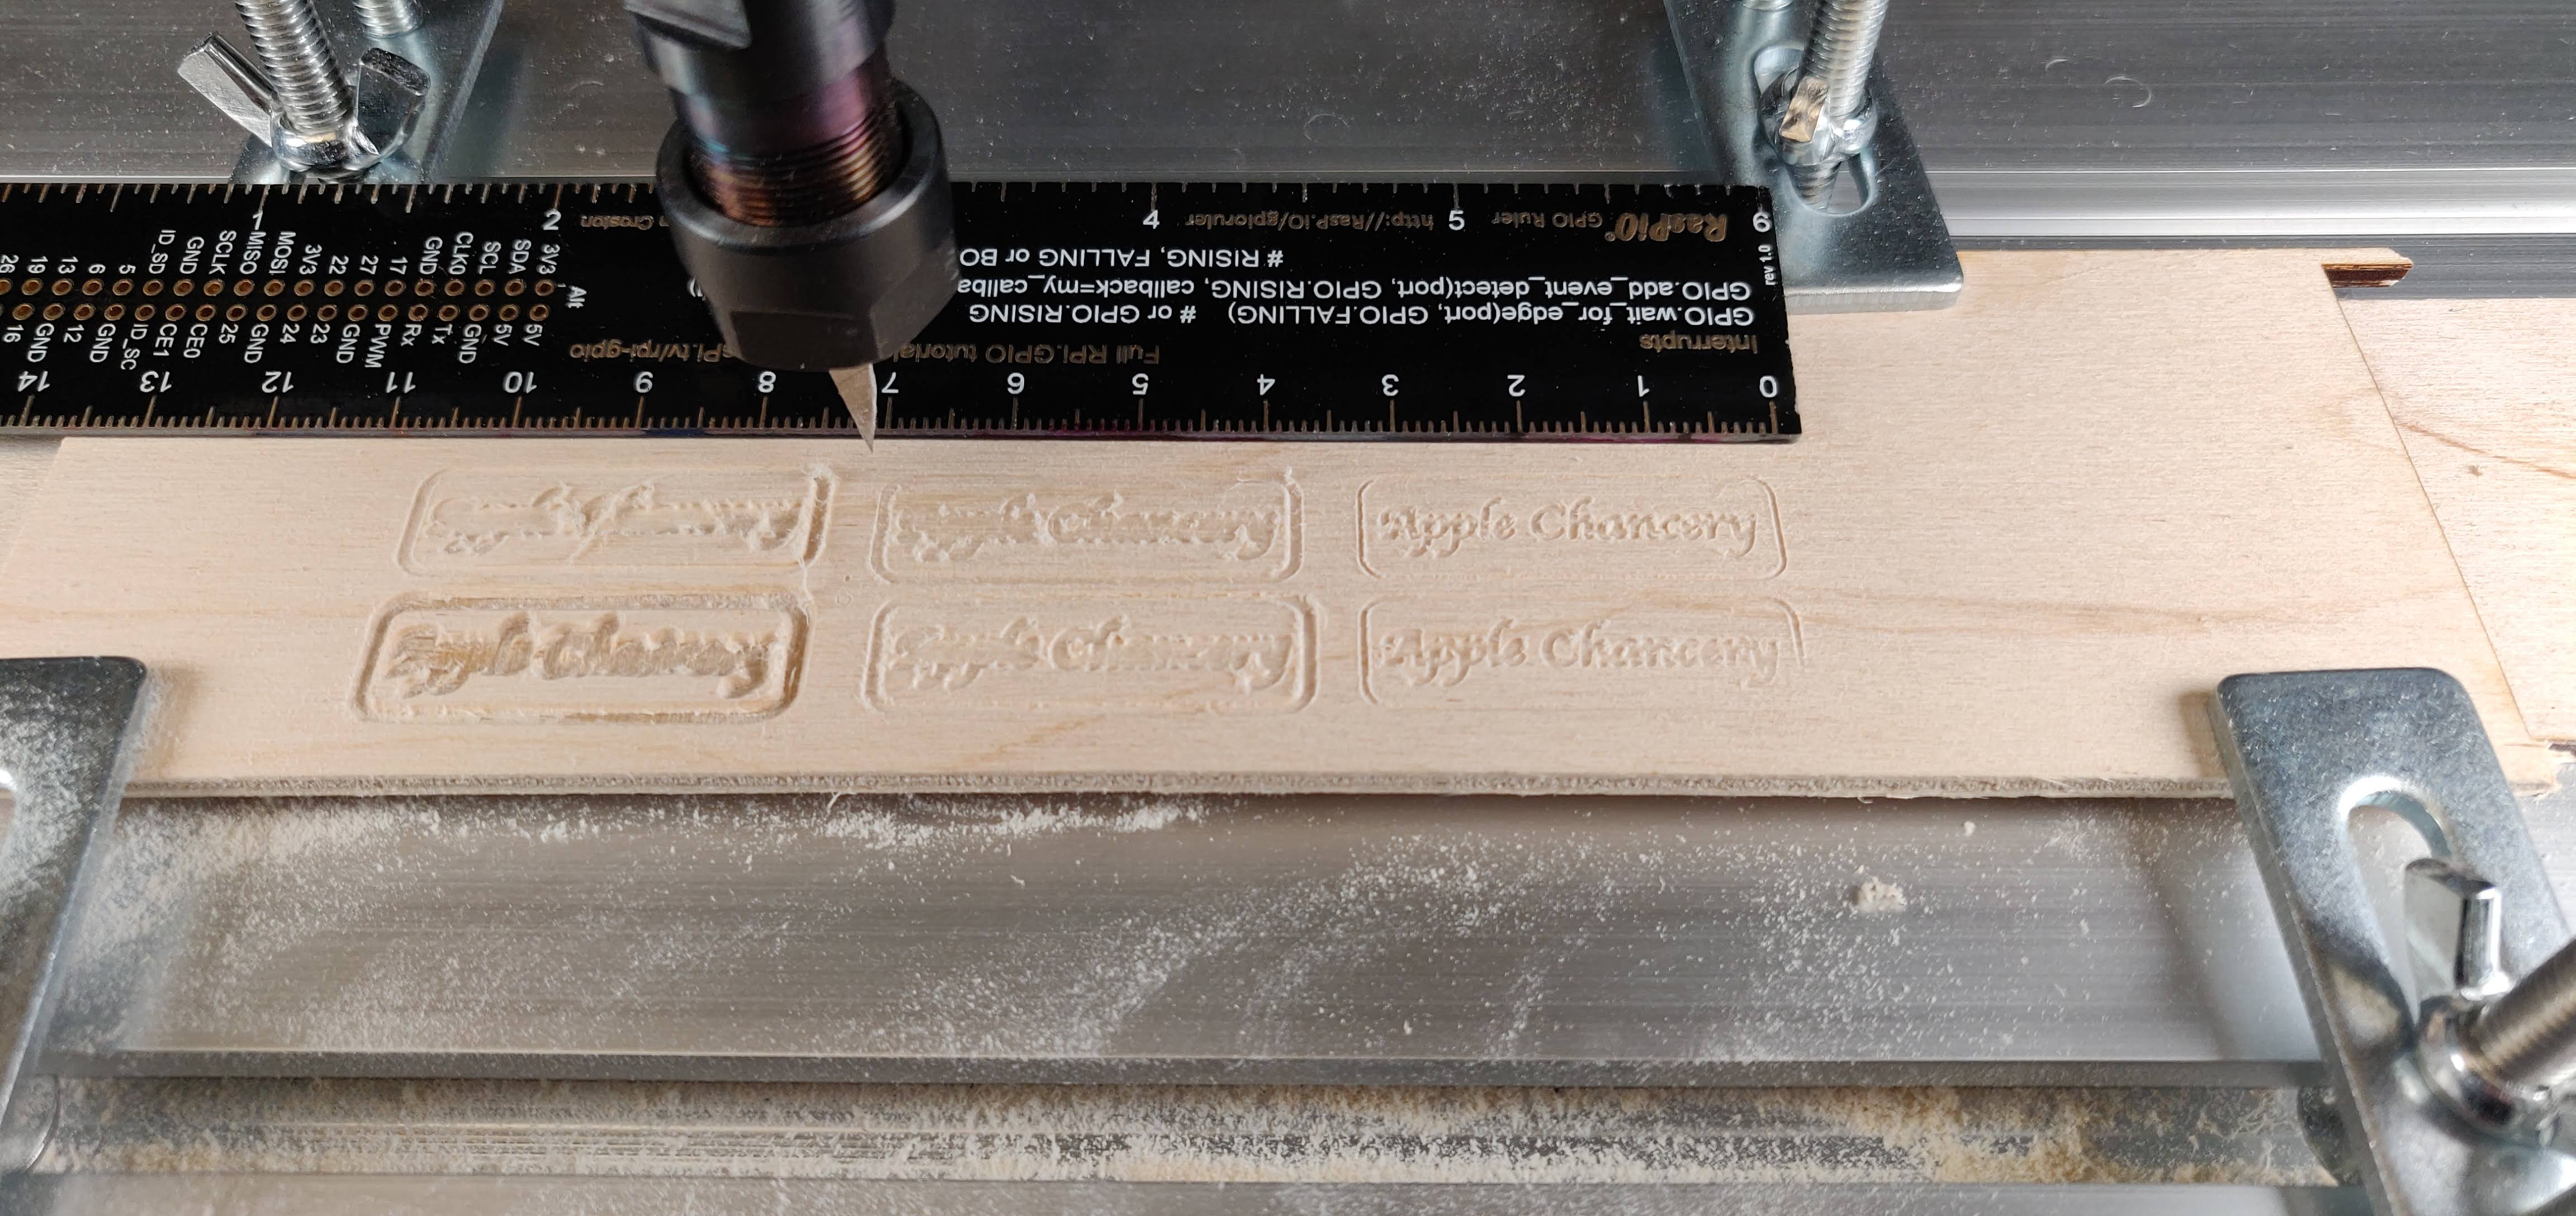
Lots of experimentation involved to find the best settings for any given material. There is definitely skill involved, as the wrong settings will result in crap work and broken bits.

With a decent quality cutting tool (router bit) and the right settings, you can get some rather nice results

The supplied motor is a bit weedy, but can allegedly engrave and cut aluminium, if you’re careful with the settings, so that obviously had to be tried…

Engraving with 3 different bit profiles in aluminium gives different effects

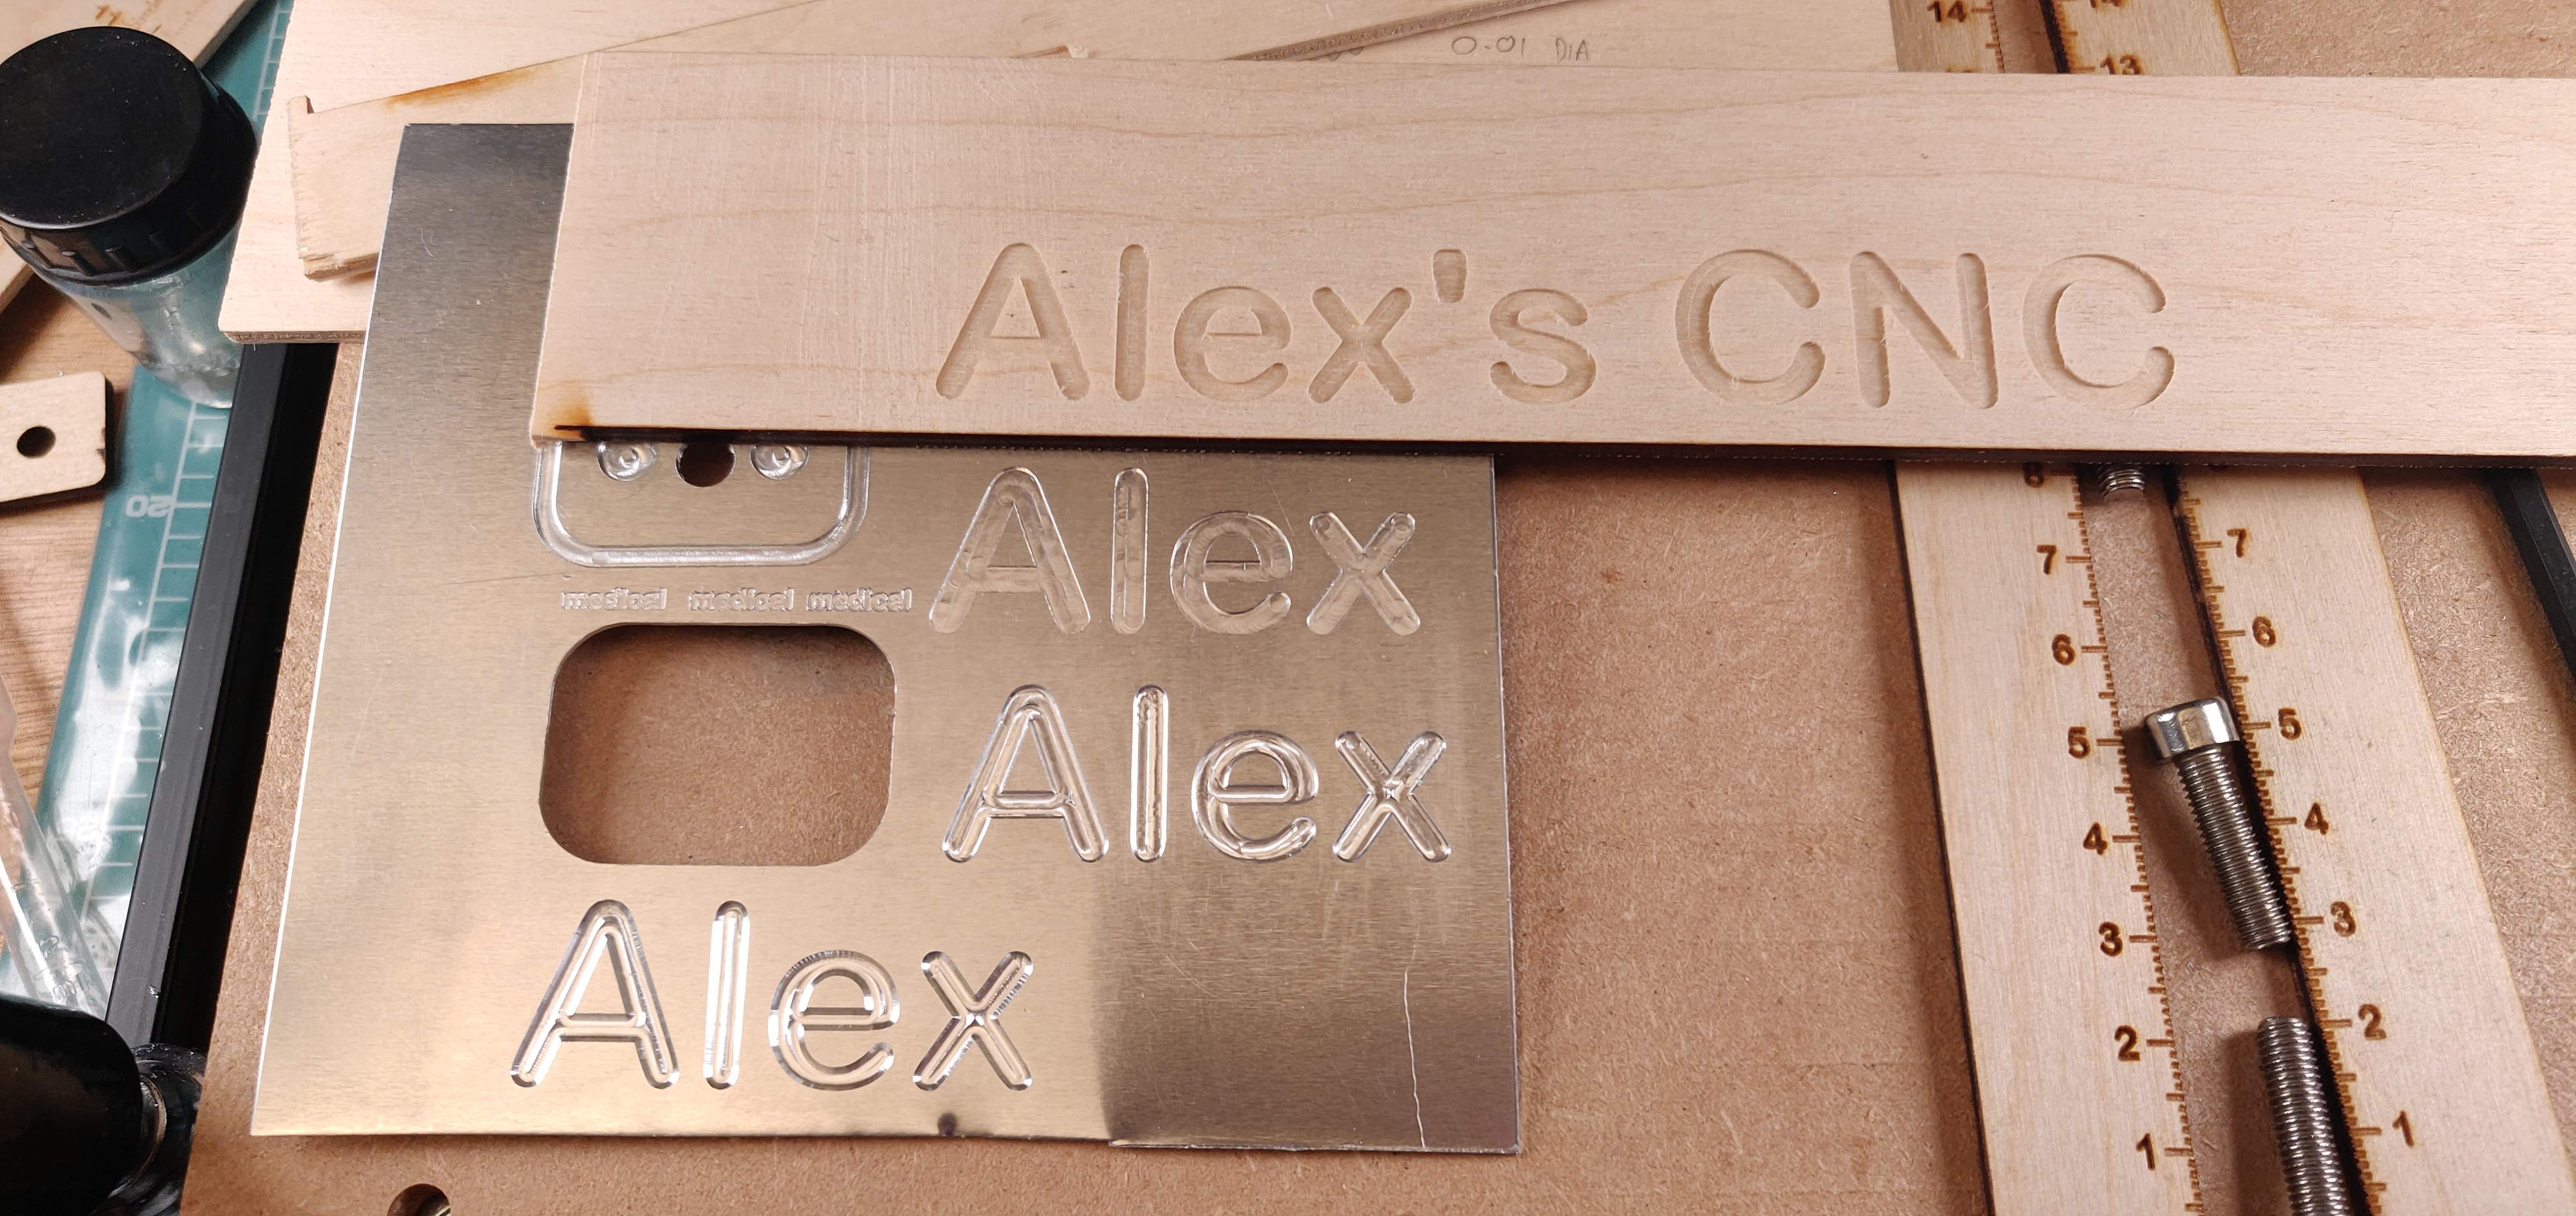
With this setup, aluminium needs very shallow cuts (0.02-0.05mm) and plenty of lubricant, but it can be done because the machine is capable of repeating the same movement very precisely over and over again. So you can cut a profile by going round it many times taking a little each time.

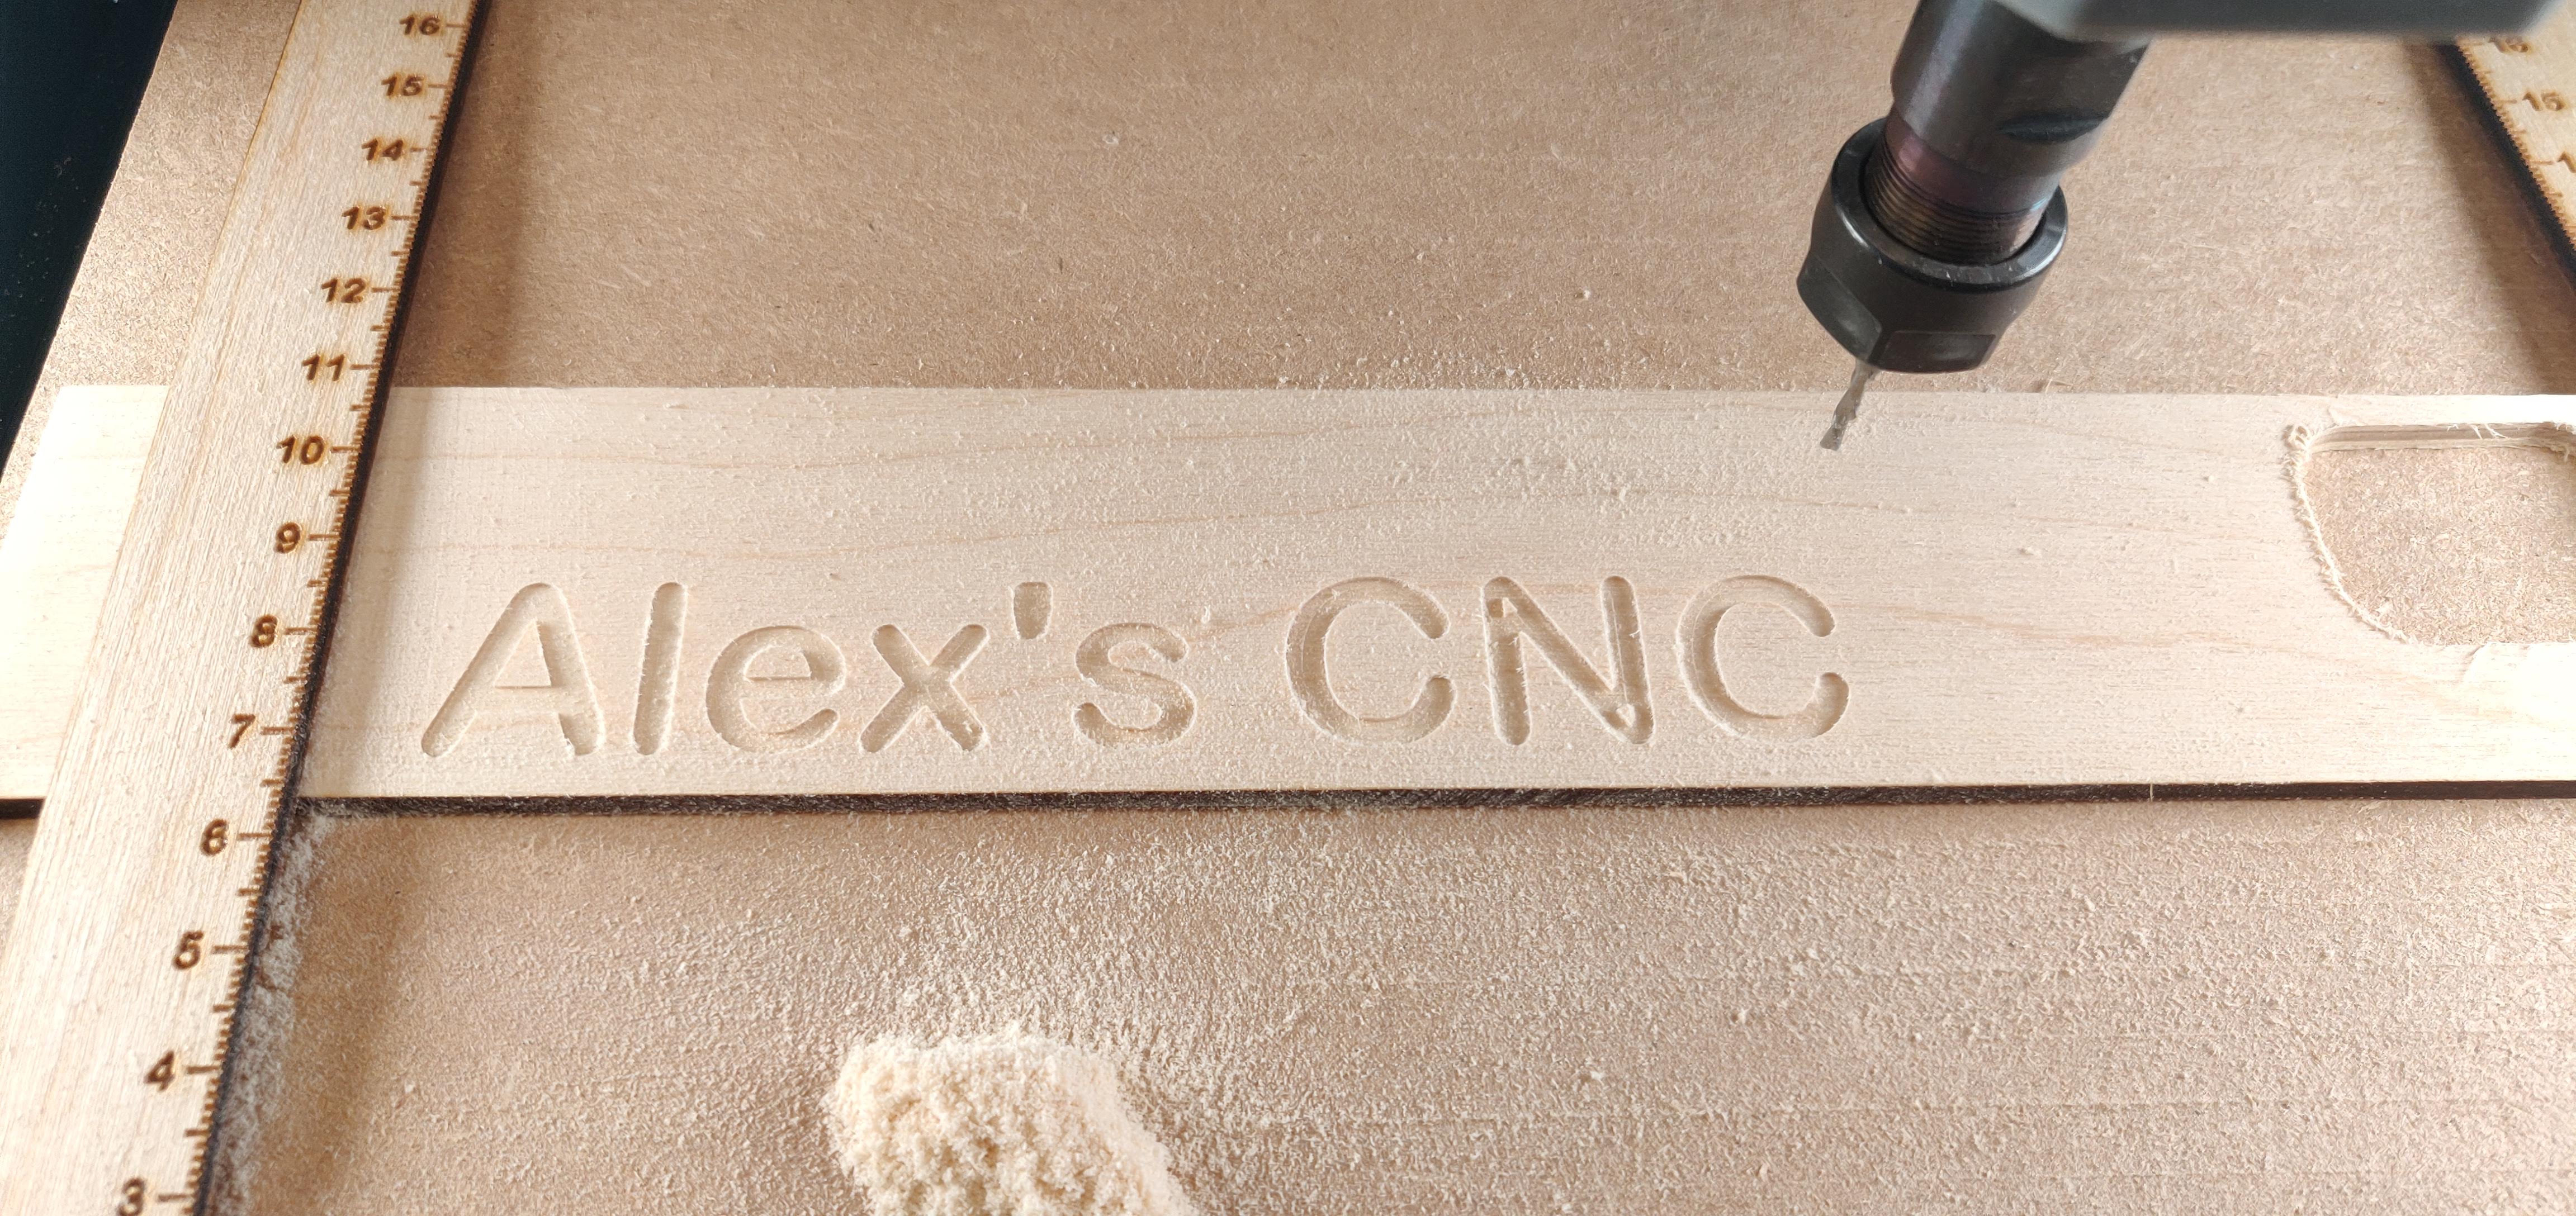
I’m using an open source software package called bCNC to control the router. It’s running on a Raspberry Pi 4. It took me about two weeks of ‘messing about time’ to get this far. A lot of it is in learning how to use the software, which is pretty poorly documented – but that’s because it’s free, so you can’t complain.

For me, learning the skills is probably more fun than using them, so I don’t find that to be a barrier, but it can cause frustration at times.

At that point, I stumbled across the concept of “V-carving”which enables you to do relief carving using a V-shaped bit. Another open source package, called F-engrave facilitates this.

V-carve can work quite well with the right piece
This spiral on birch turned out quite well, having levelled a square ‘pocket” to frame it

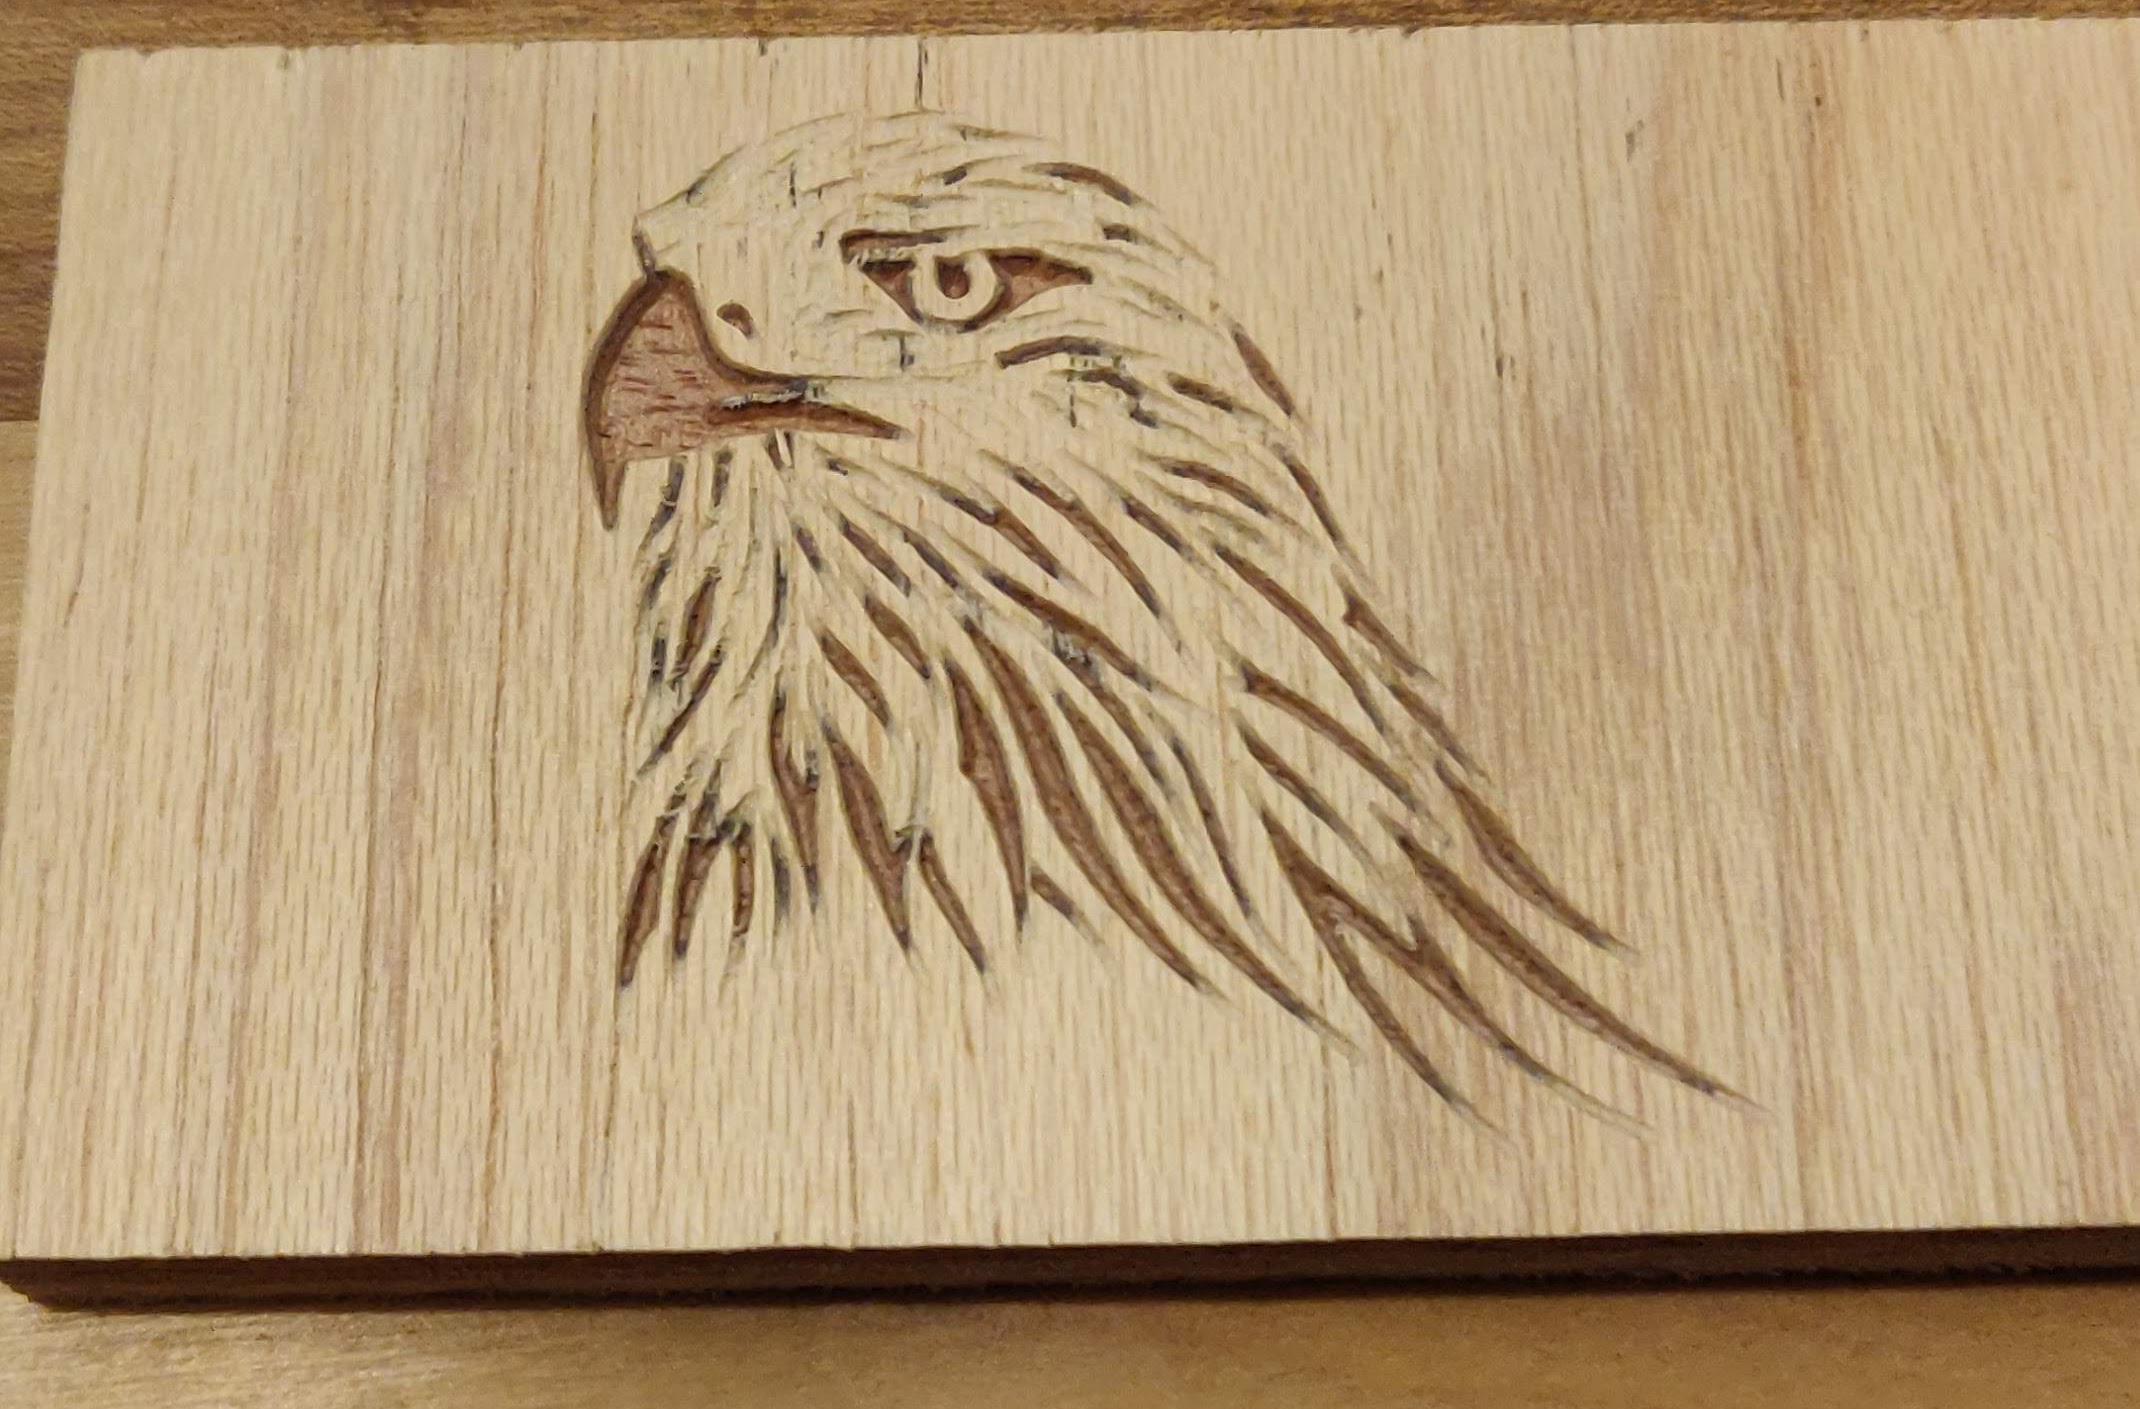
This took me up to the end of February, at which point I started getting frustrated with how long it took. When working with wood, you can ‘fire and forget’ but the machine does make a noise, which can be vaguely irritating if it goes on for 5 hours (the longest job I’ve run so far).

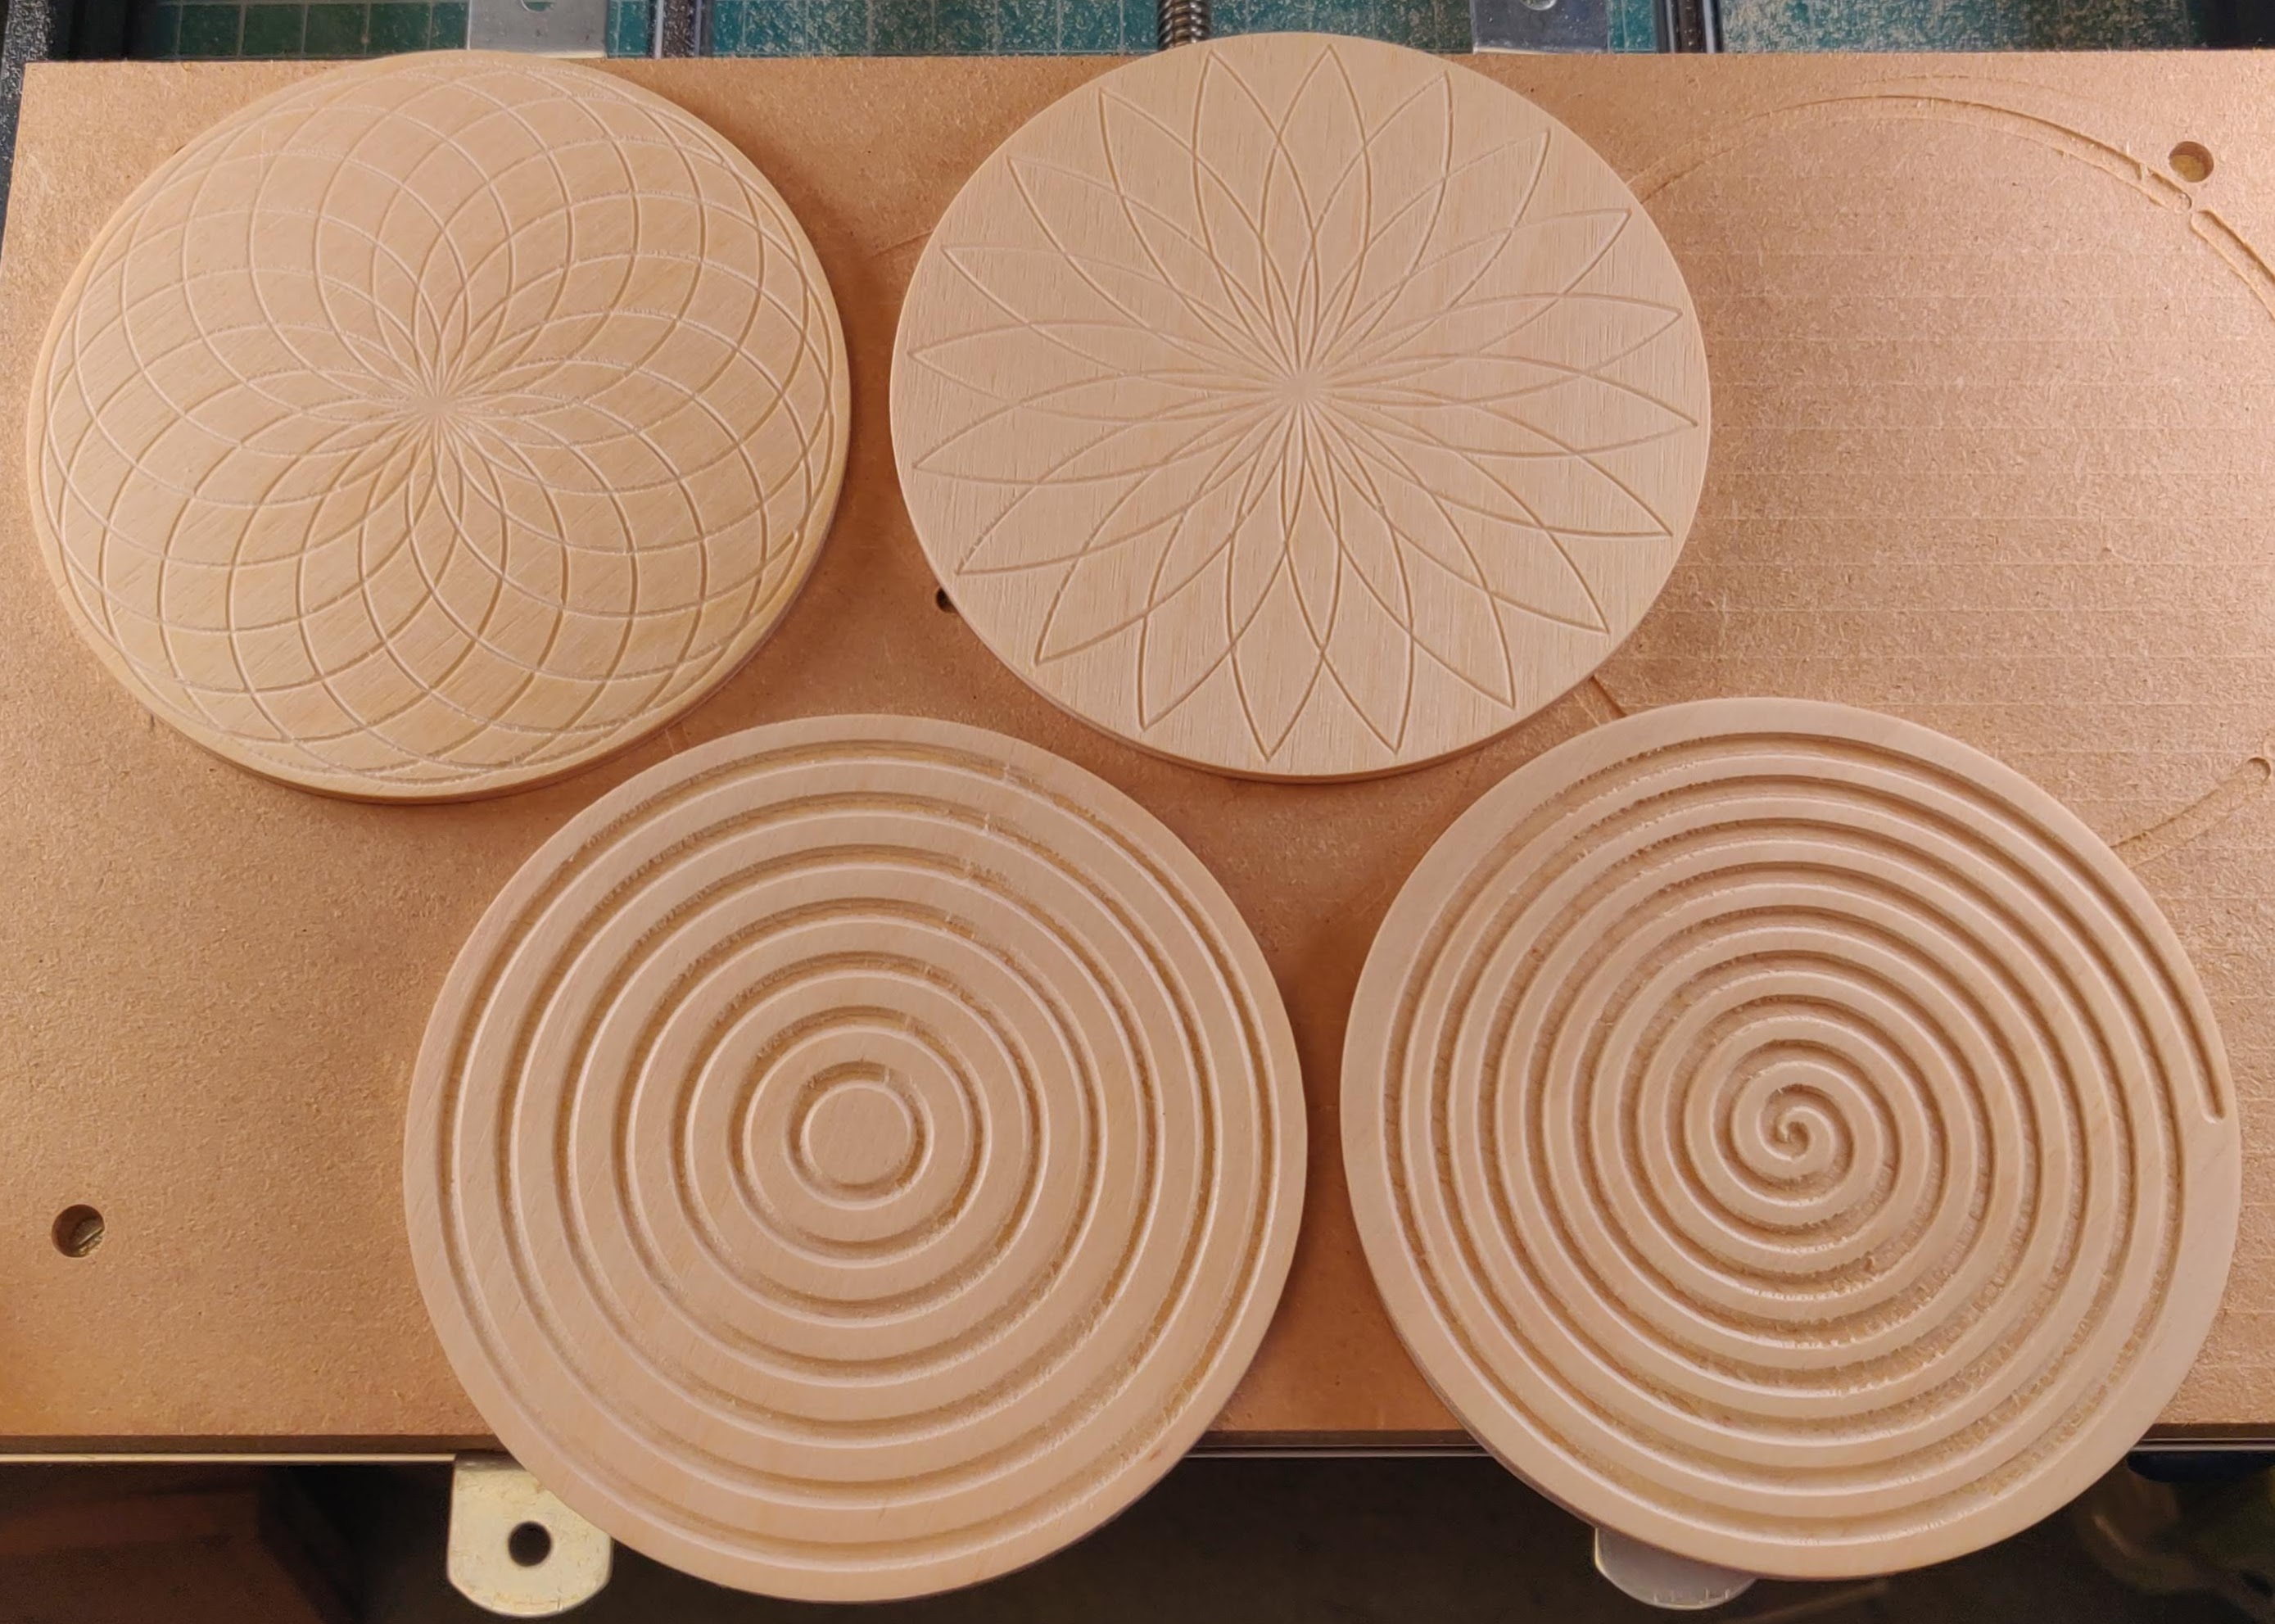
Fortunately, I’d already ordered a much more powerful motor upgrade, which promised more capabilities – i.e. better speed and deeper cuts. But while that was on the way from China, I did some experiments with some potential designs for coasters…

100mm coaster candidates using ball nose bit

And I got it into my head to try a Greek pattern, so found one on the web and adapted it. This is the job that took five hours to run…

5 hours with a 0.5mm V bit

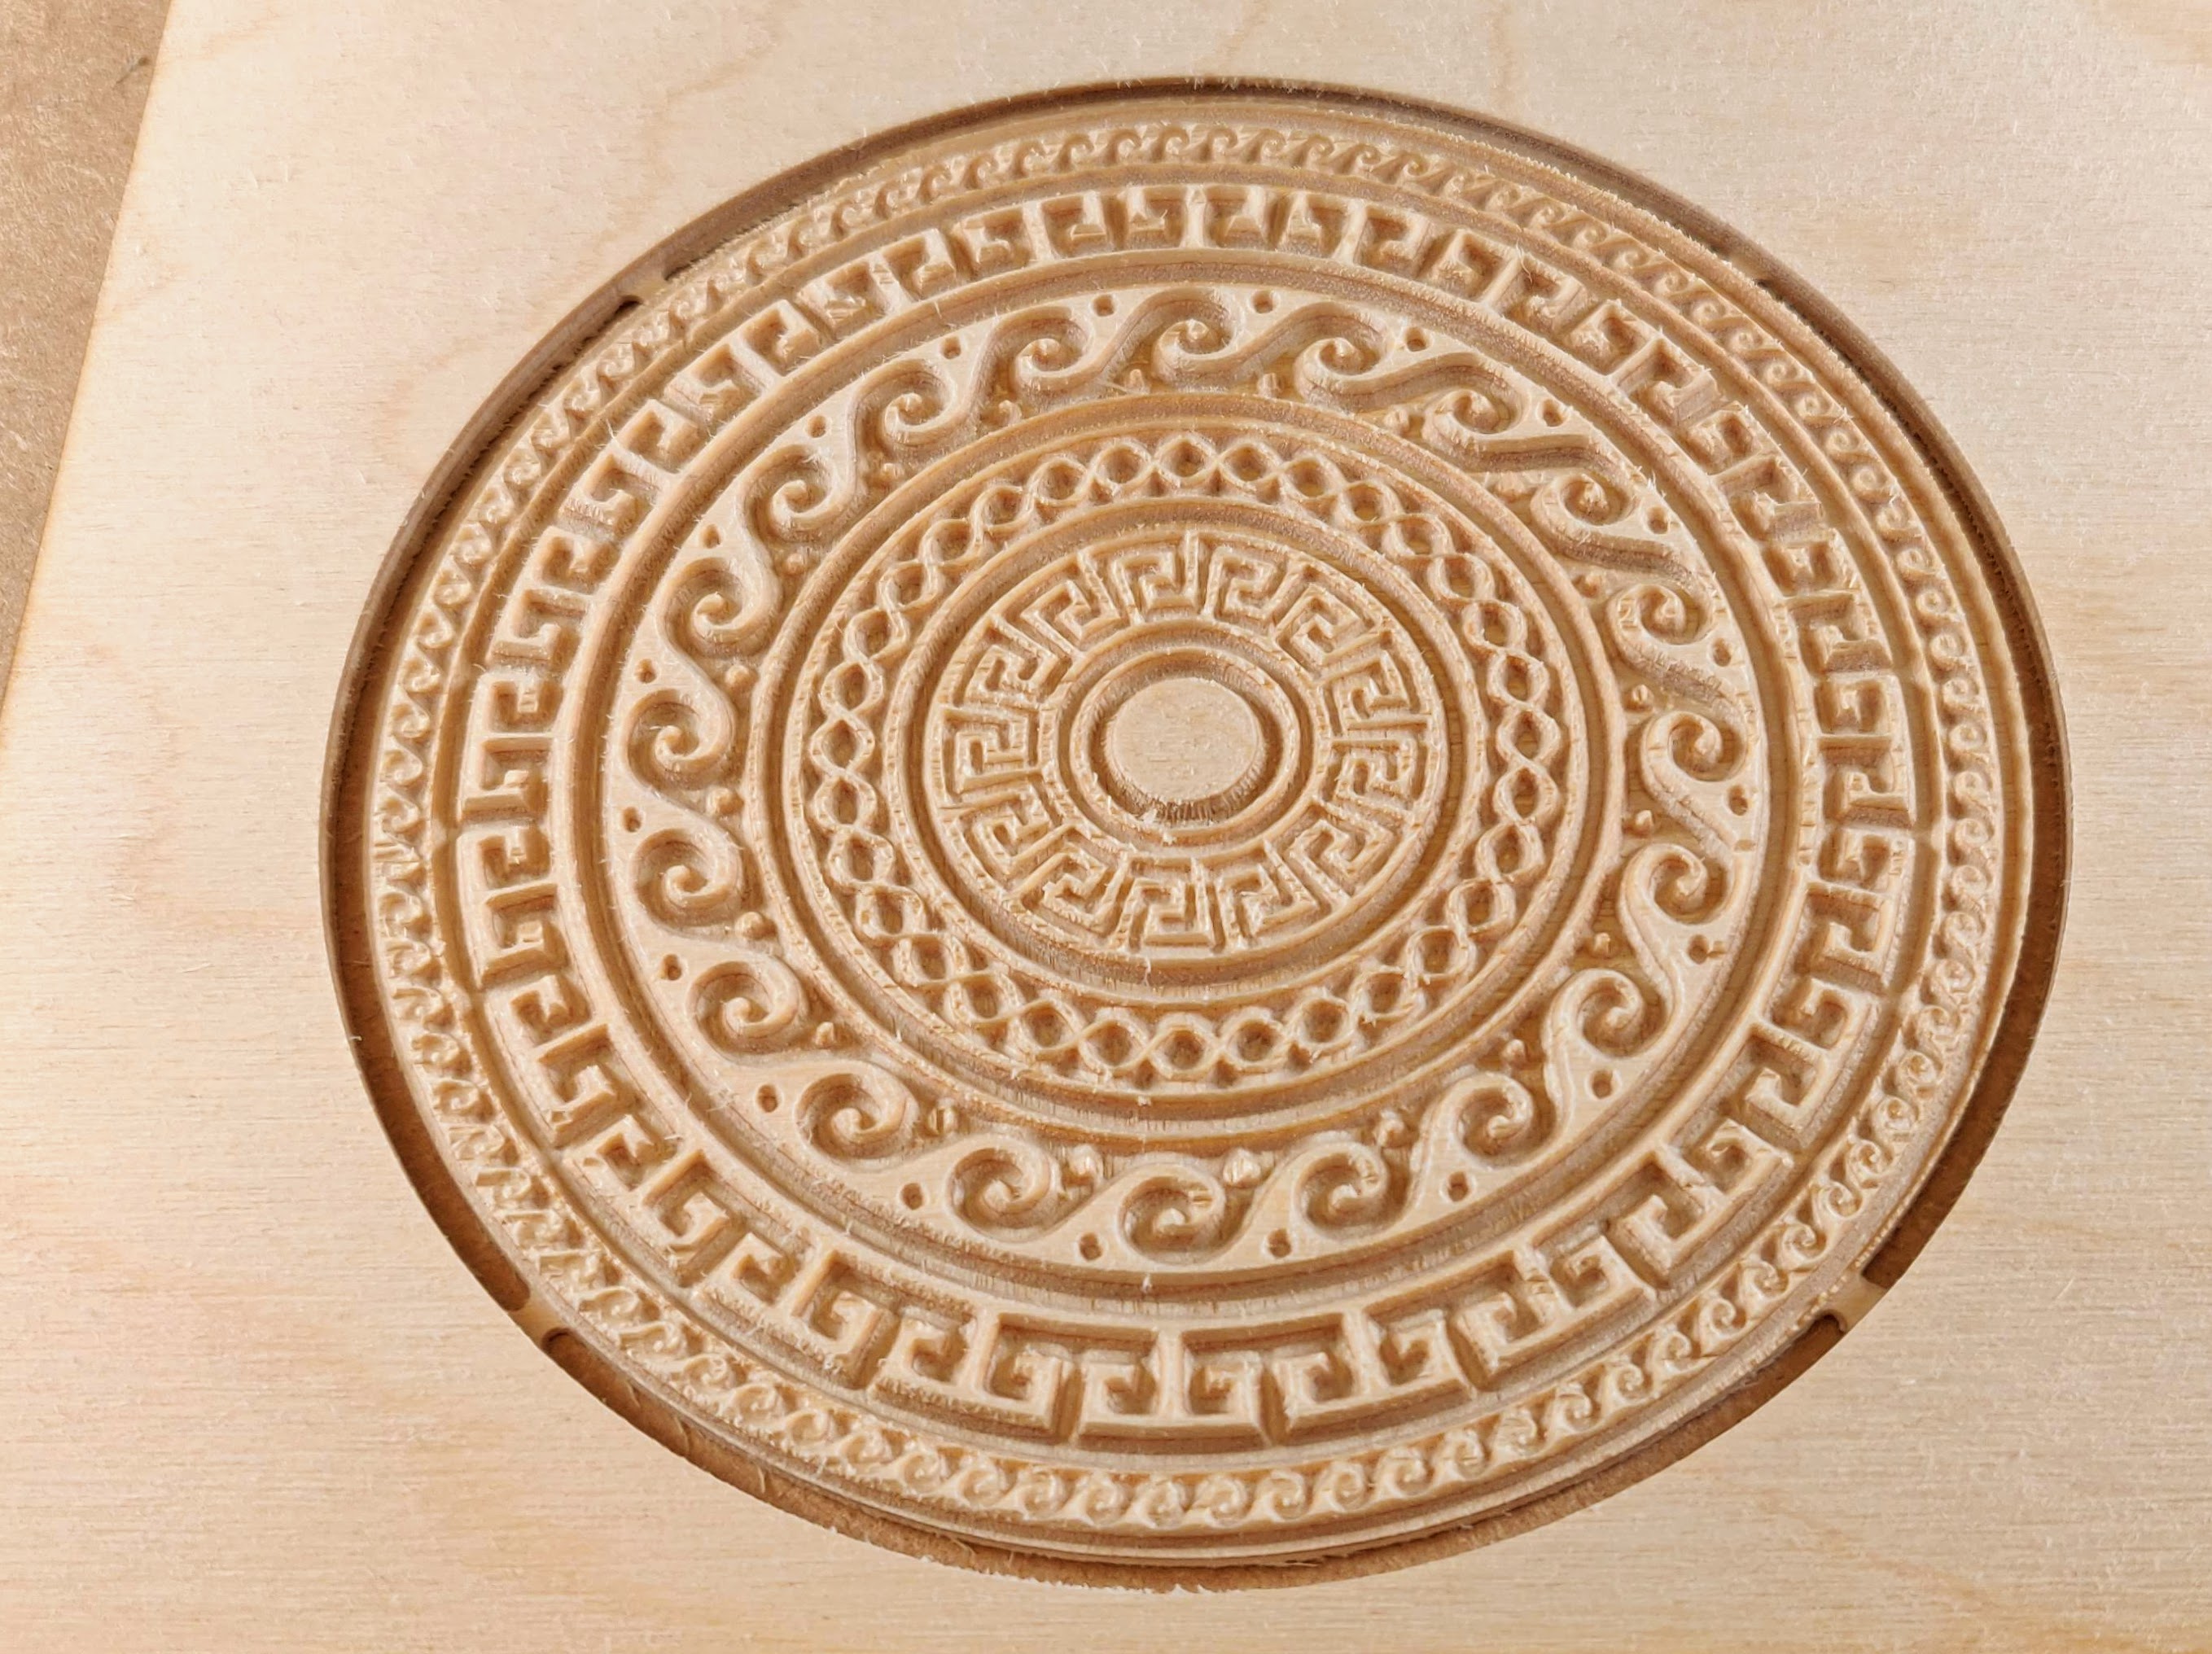
I was quite pleased with that one. There are some slight tearing issues due to the weakness of the ply veneer, but it shows that the stock machine is capable of some quite complex and precise work over a sustained period.

Then the new motor arrived. It’s massive compared to the original one.

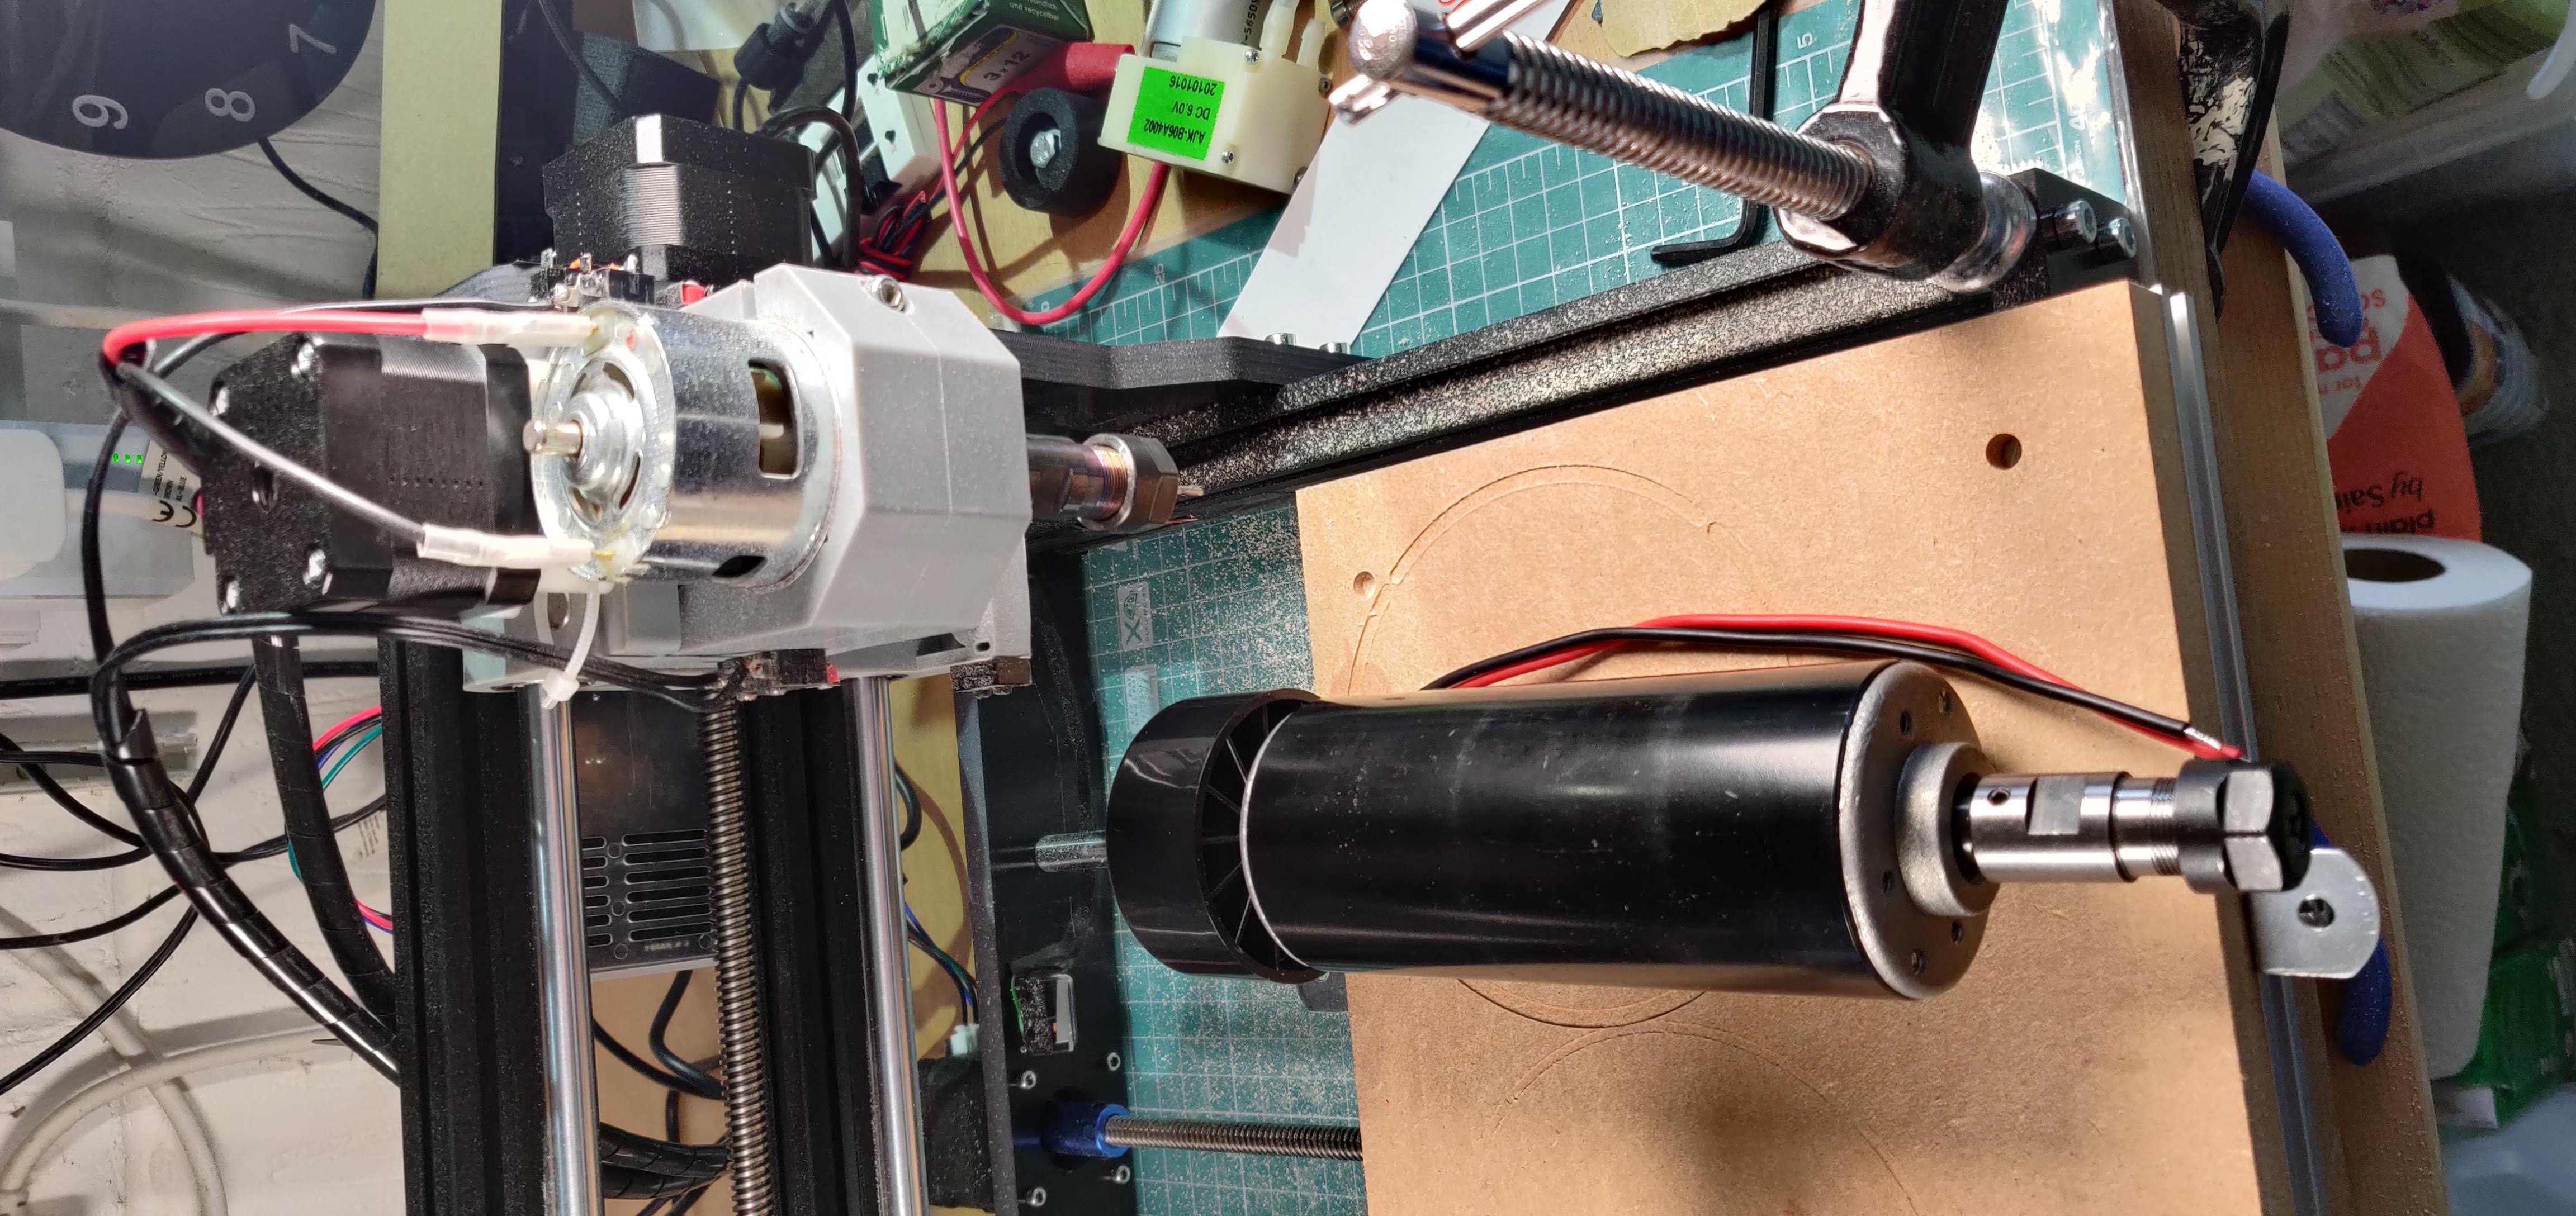
It took me a couple of days to upgrade the motor. I had to build a mount for it – thankfully someone had already done it, so was able to more or less copy their design, but obviously I tweaked it – as you do.

Motor mount built and ready to receive the motor
It fits in like this

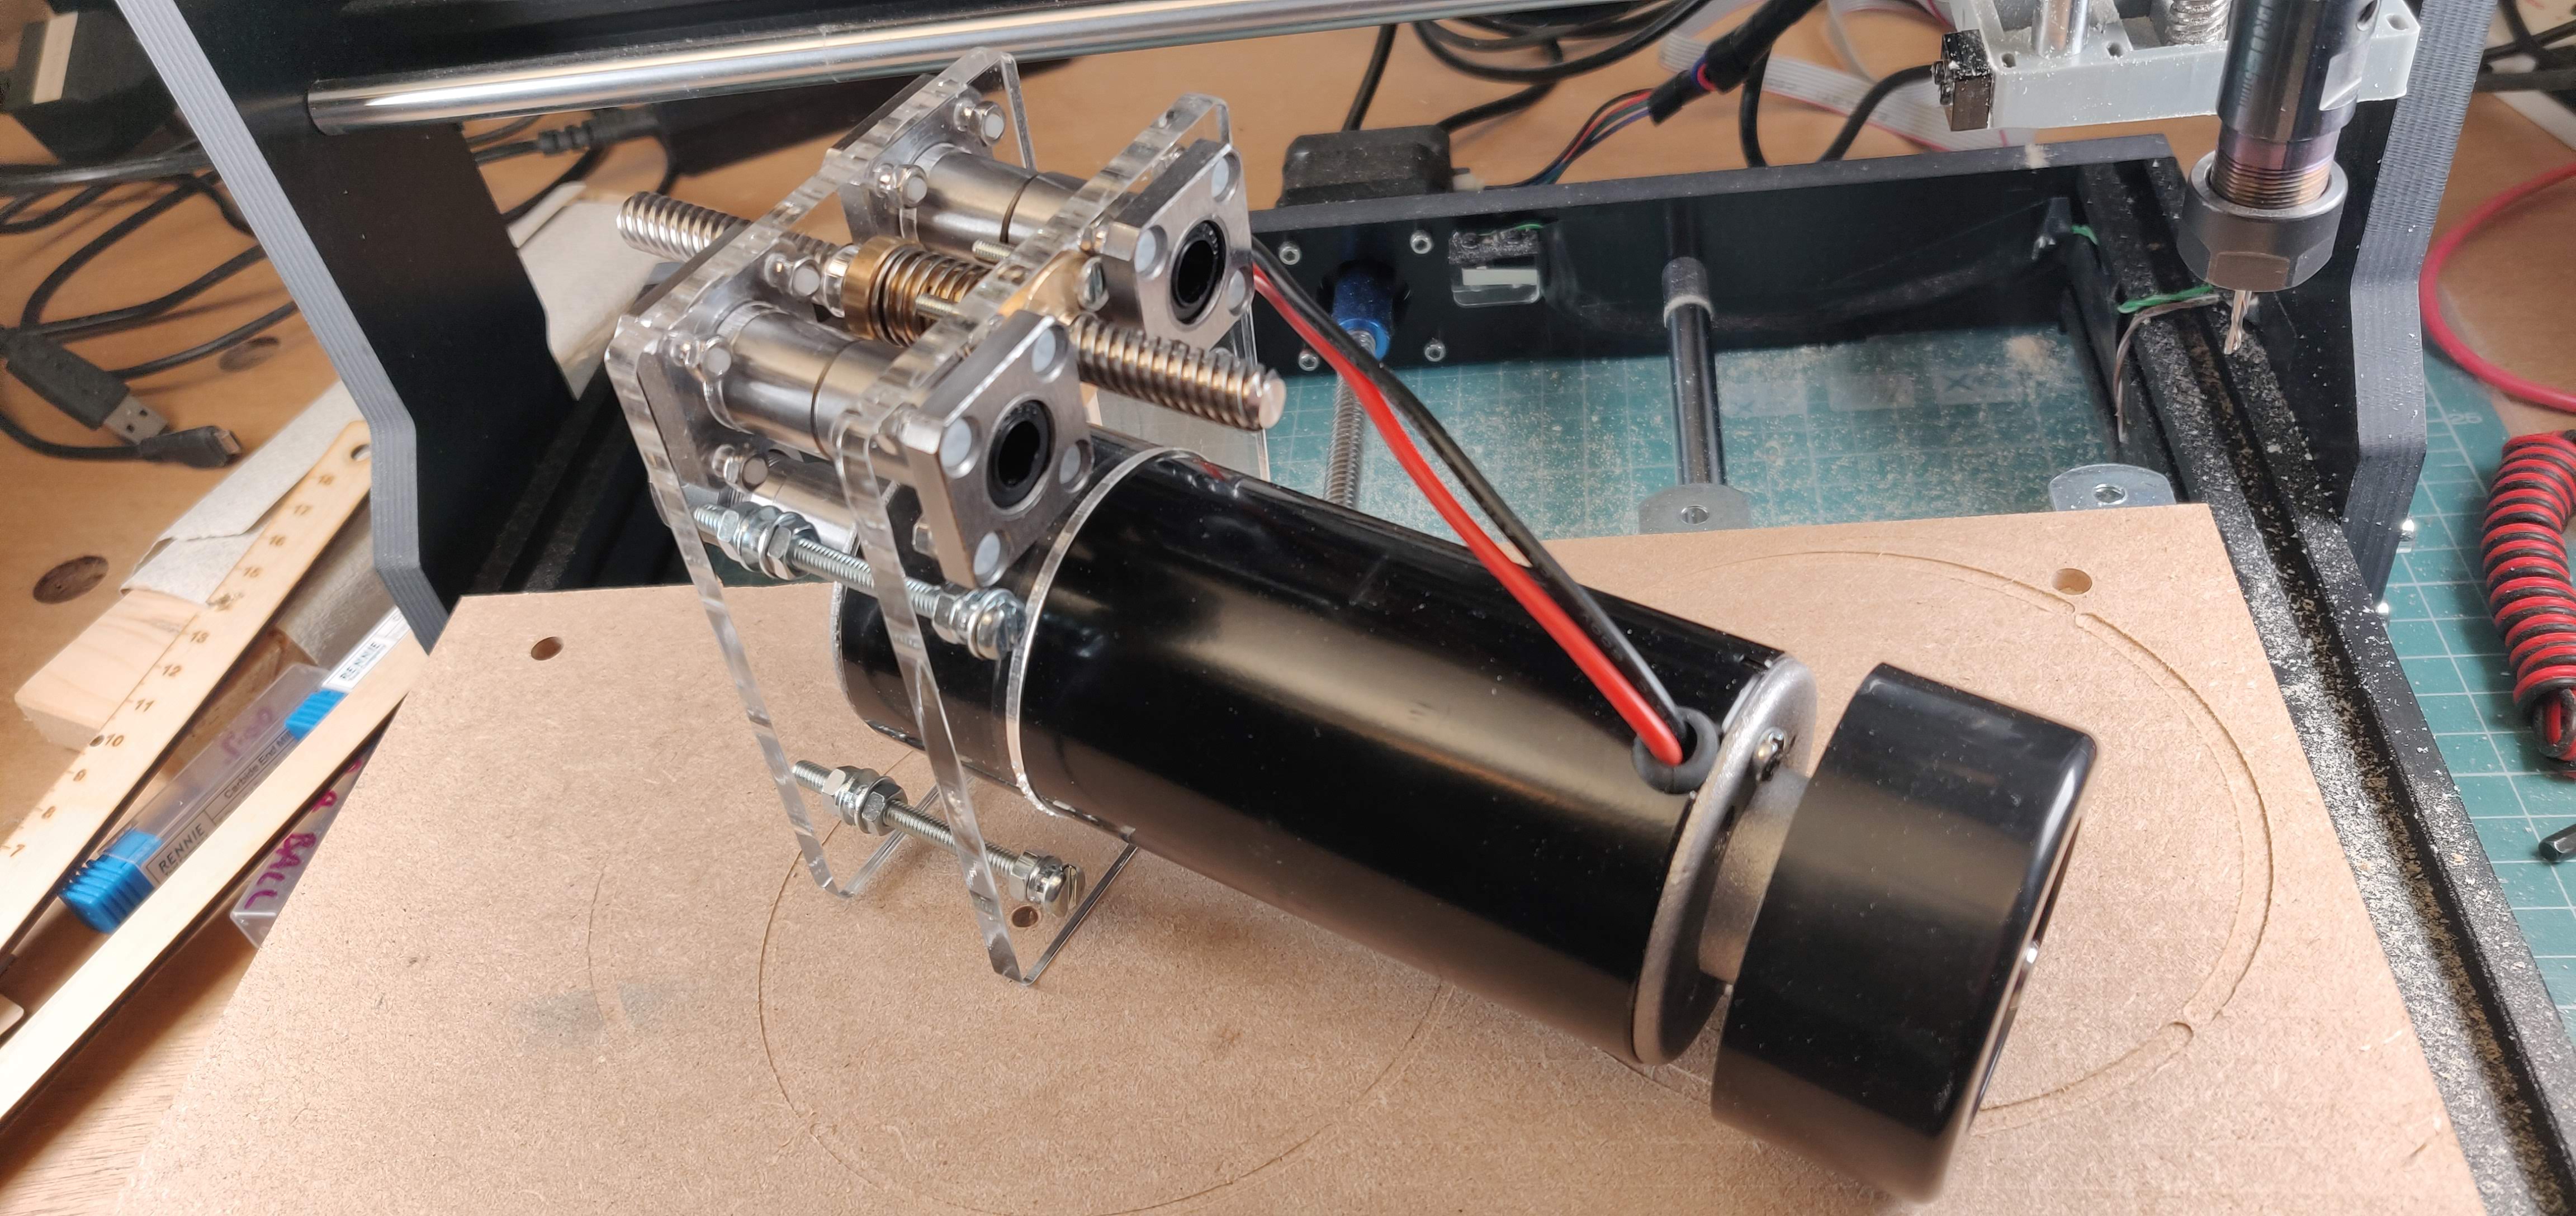
The circular black fan on top of the motor was off-centre. It caused wobble and vibration. So I designed and made one out of laser cut, heat-bent perspex. It’s basically a small 4-bladed propellor.

Custom-made fan, works very well to cool motor

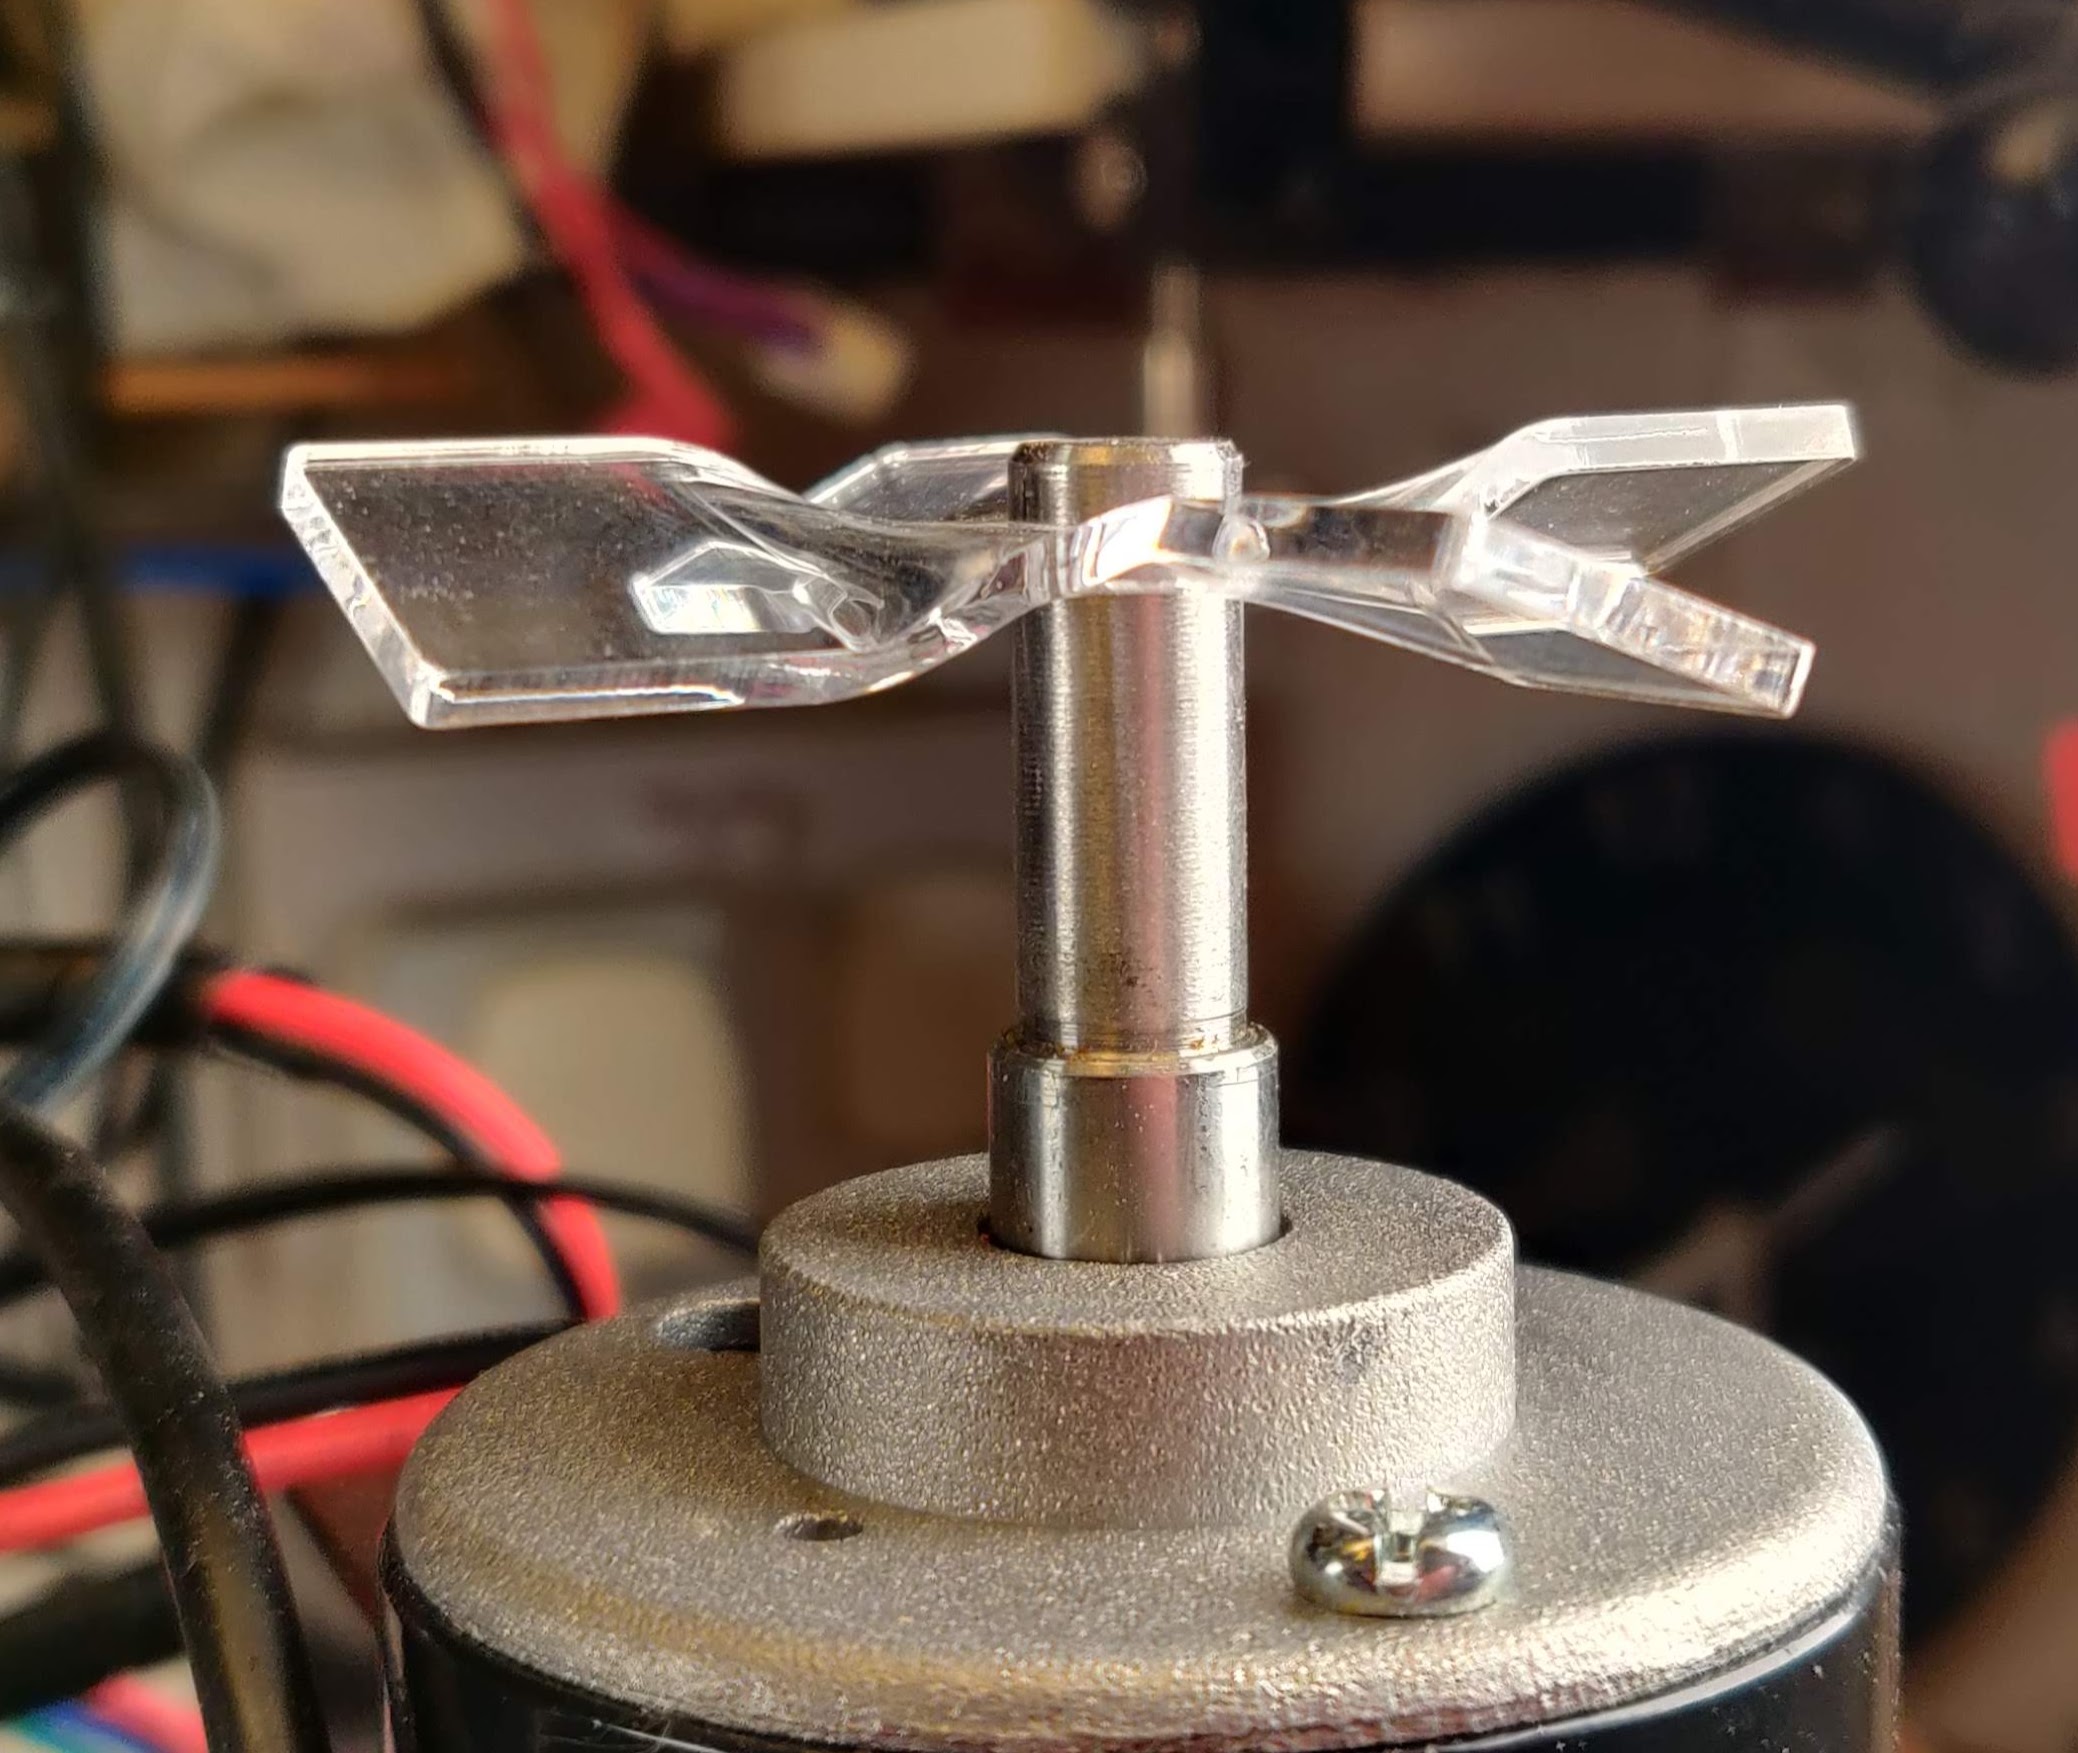
Putting a temperature probe on the motor case shows a huge difference with the fan. The motor gets too hot to touch after about 5 minutes running without it. With the fan in place, you can run it for a long time with no issues.

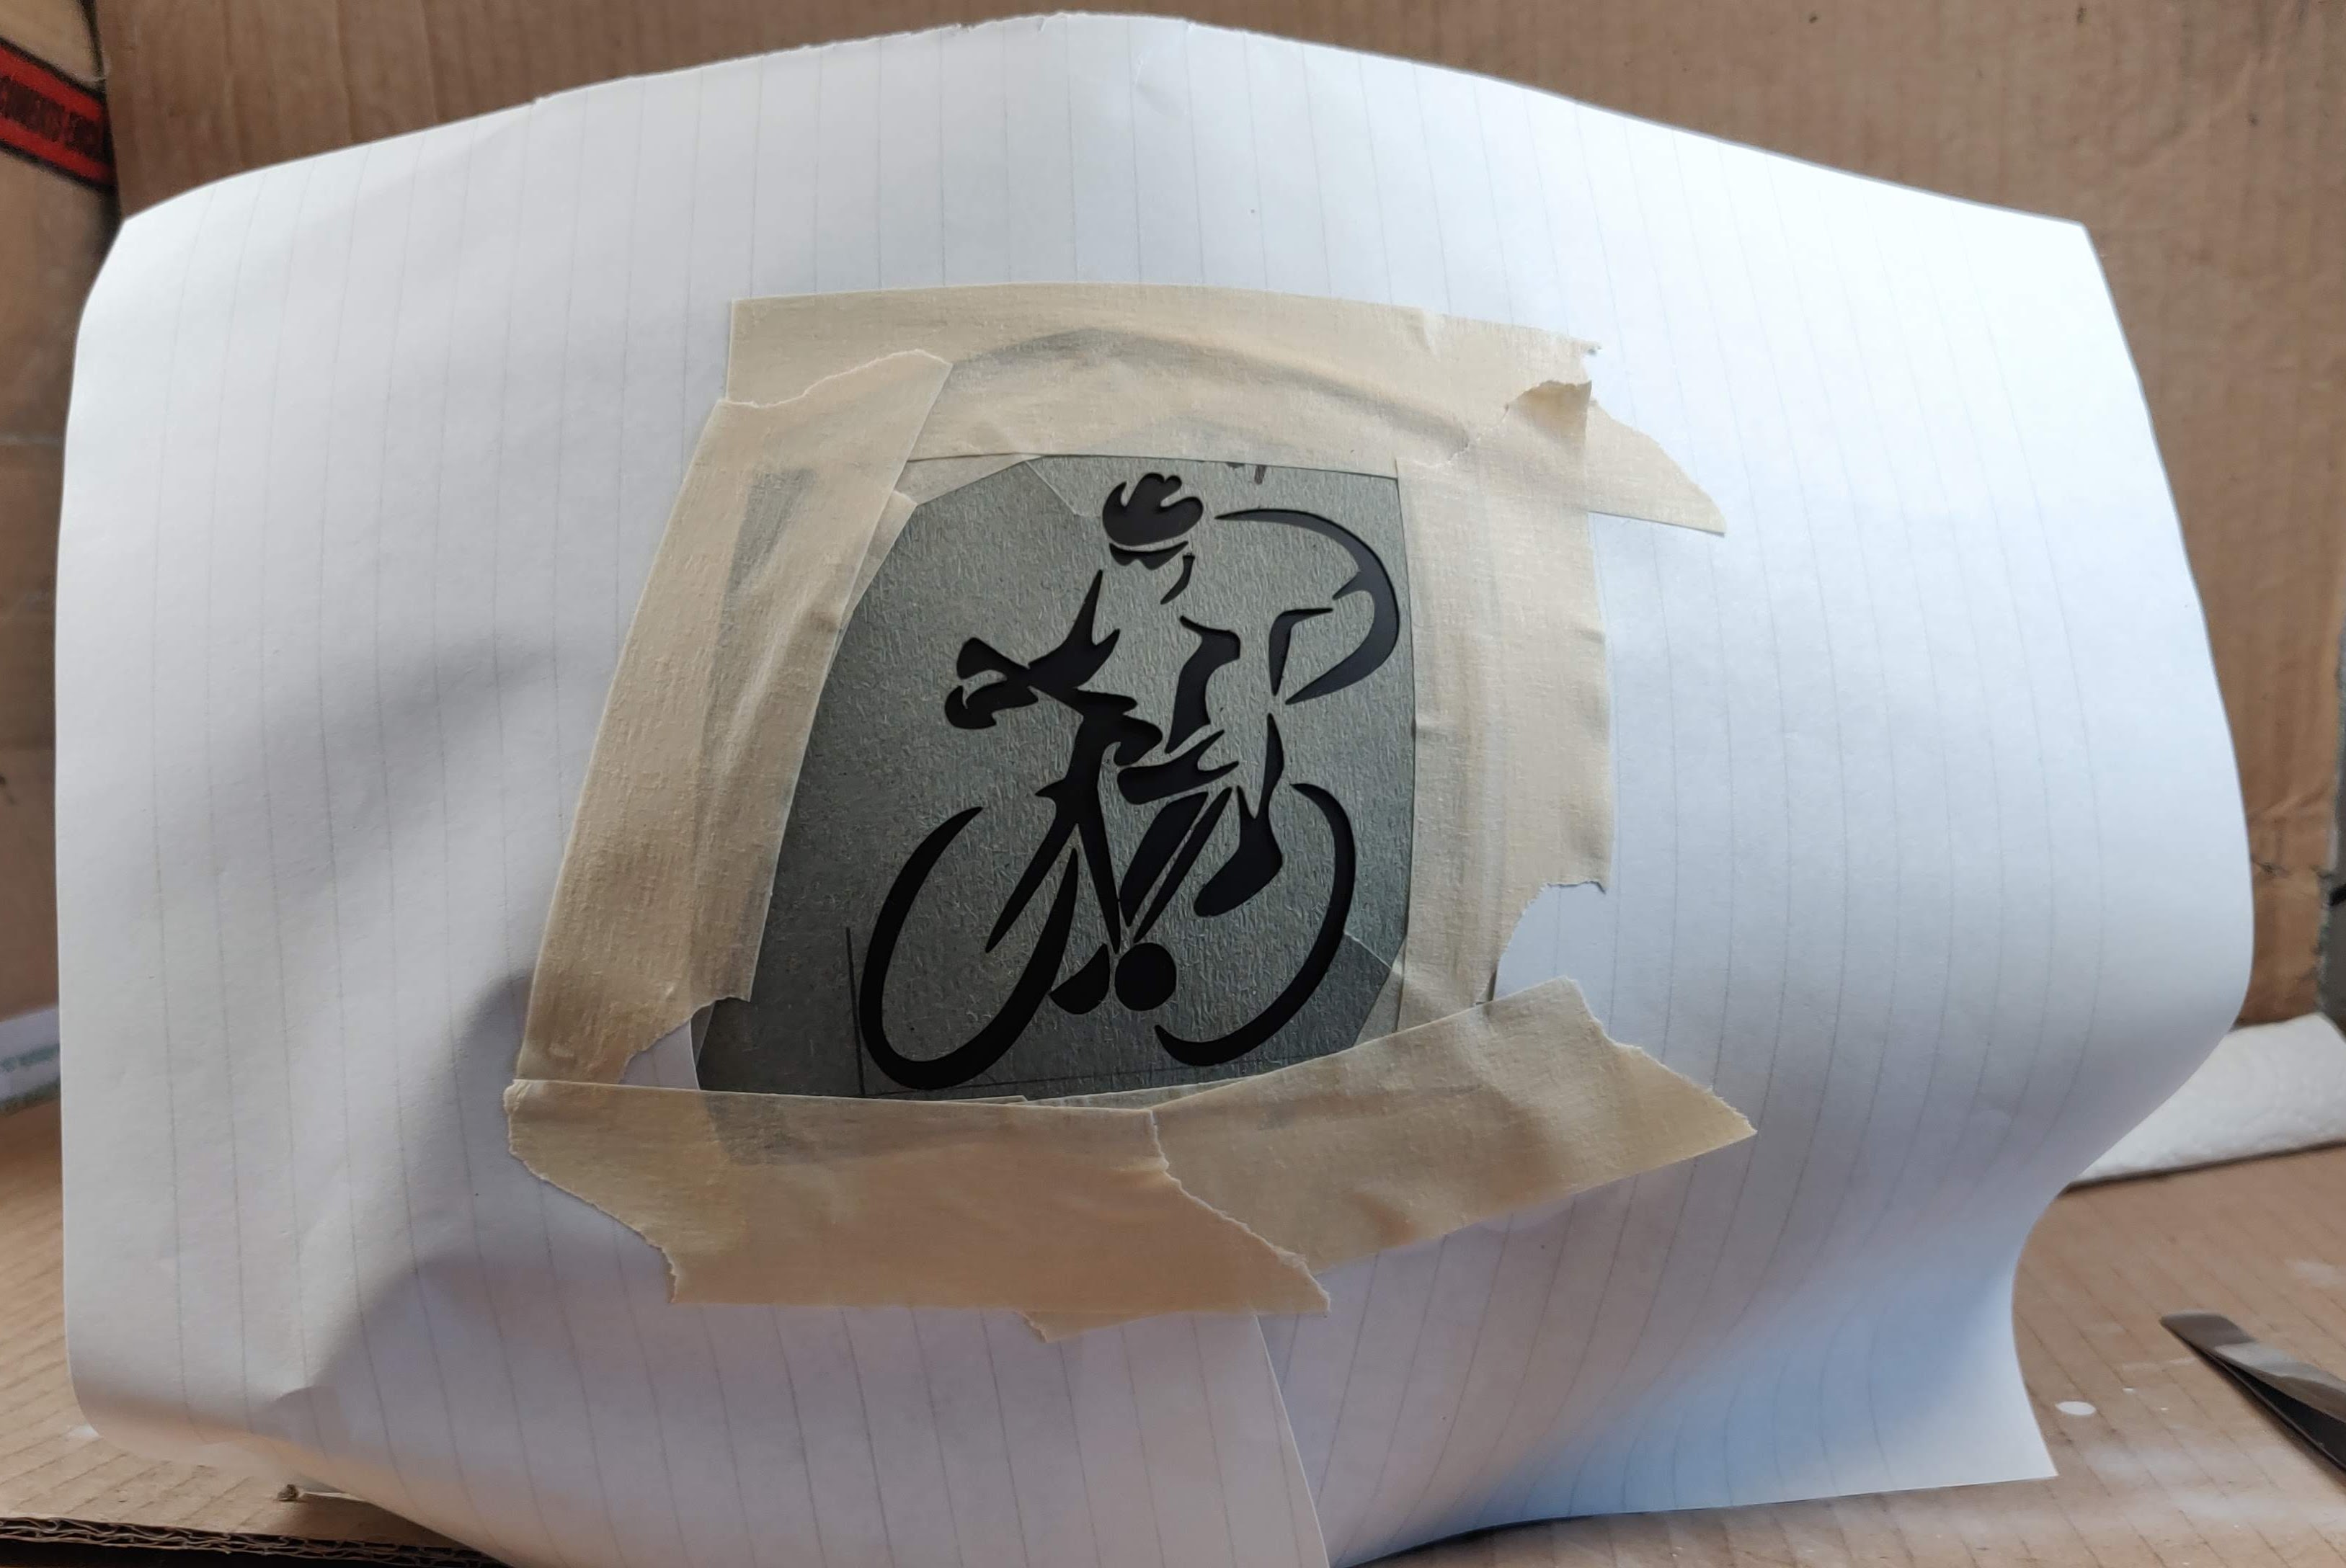
So much more playing to find the new, faster, deeper settings that the new motor is capable of. I’d also ordered a small square of brass to play with, and wanted something small to test it out. So I designed a small spoke key and valve-core remover to go in the saddle-bag.

This took about an hour to cut, but I’m delighted with the results

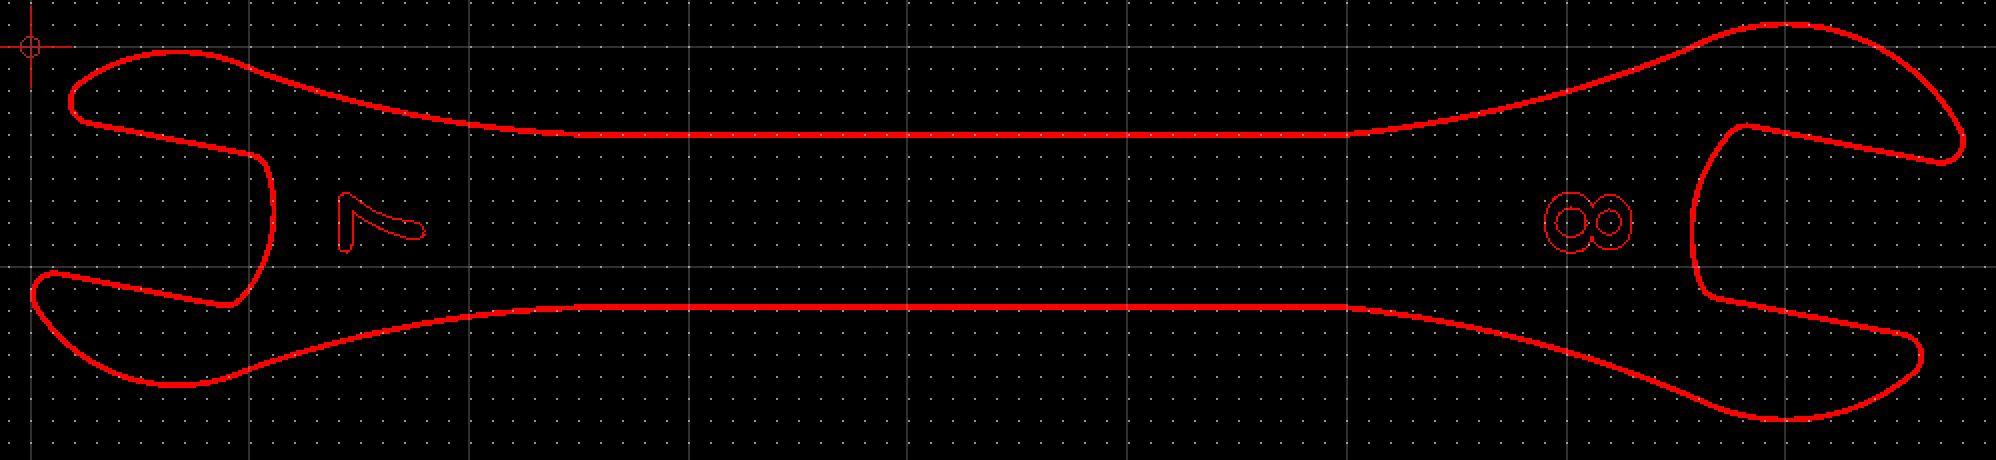
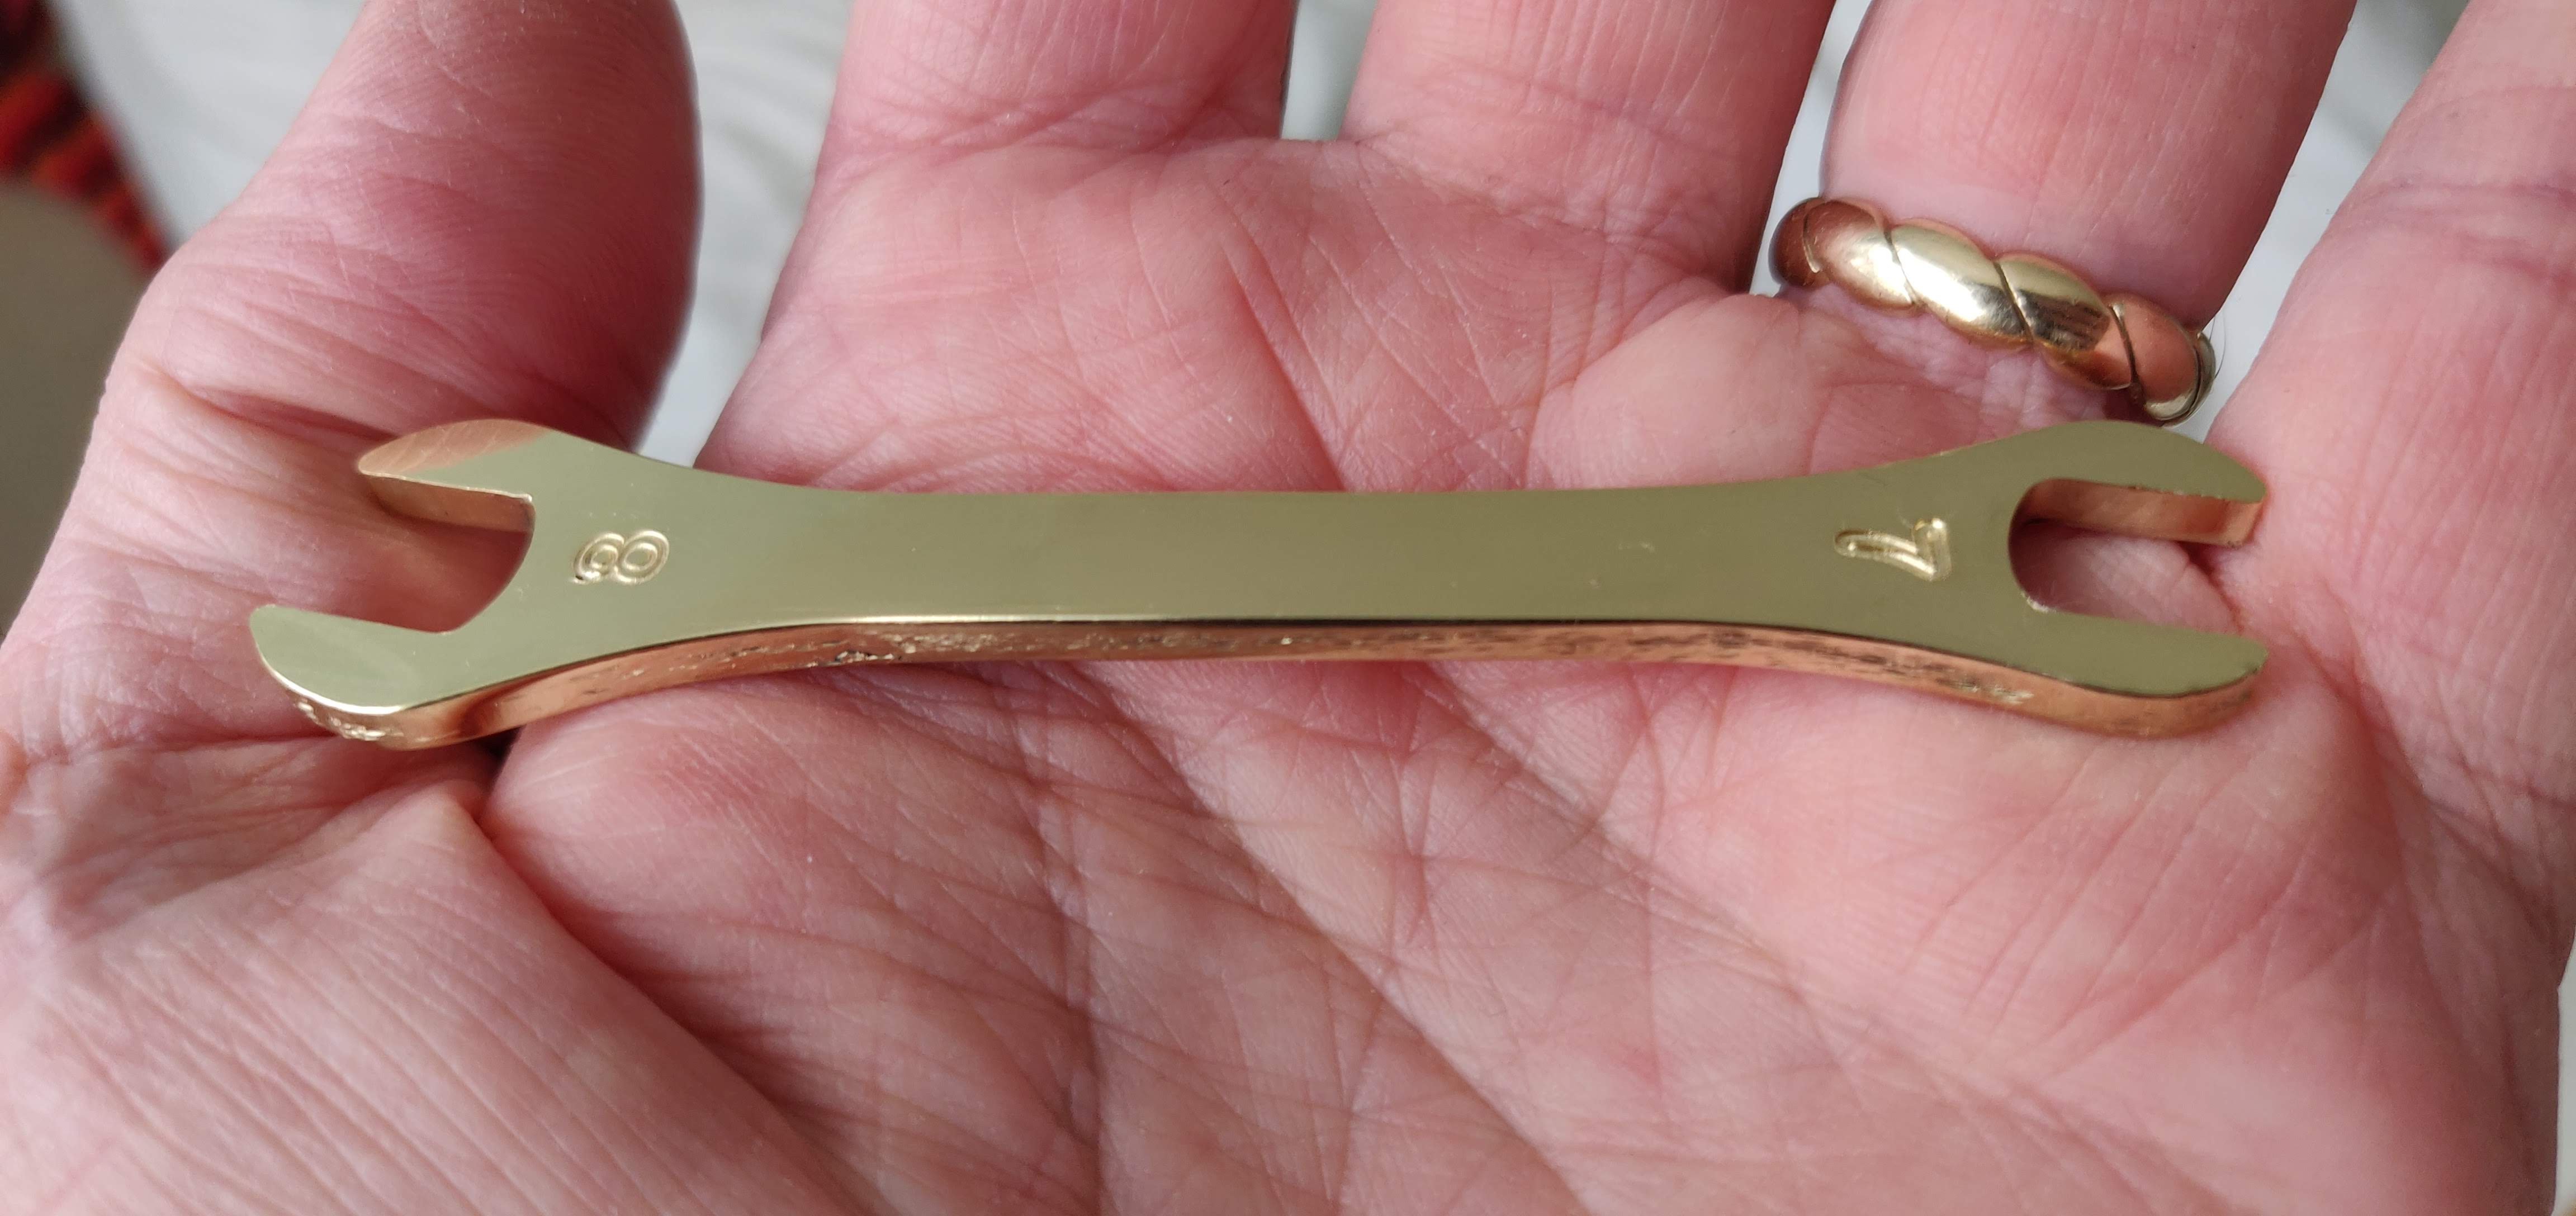
Not knowing the right settings, I took it very slowly and cautiously, but the results were really good. Encouraged by this, I designed a 7mm-8mm spanner

Spanner design in QCAD

And this is how it eventually turned out, but not without some ‘learning’. After about an hour and a half of cutting, the job was within 10 minutes of finishing, but I hadn’t clamped it down well enough and the bit caught on the edge of the job, moving the sheet of brass out of alignment. This caused the bit to break and the job had to be finished by hand with lots of Dremelling. Then it needed a couple of hours of filing, sanding and polishing, but the final result is this, with which I am very pleased…

Brass spanner cut on CNC router and finished by hand

Better clamping will avoid such issues in future. Bits do break now and then, particularly on harder materials. It’s just part of the game.

So that brings me right up to mid-March. The next thing I did was design a pen-holder to turn the machine into a pen plotter. This turned out to be almost ‘disappointingly easy’, in that it worked first time and only took about 2 hours.

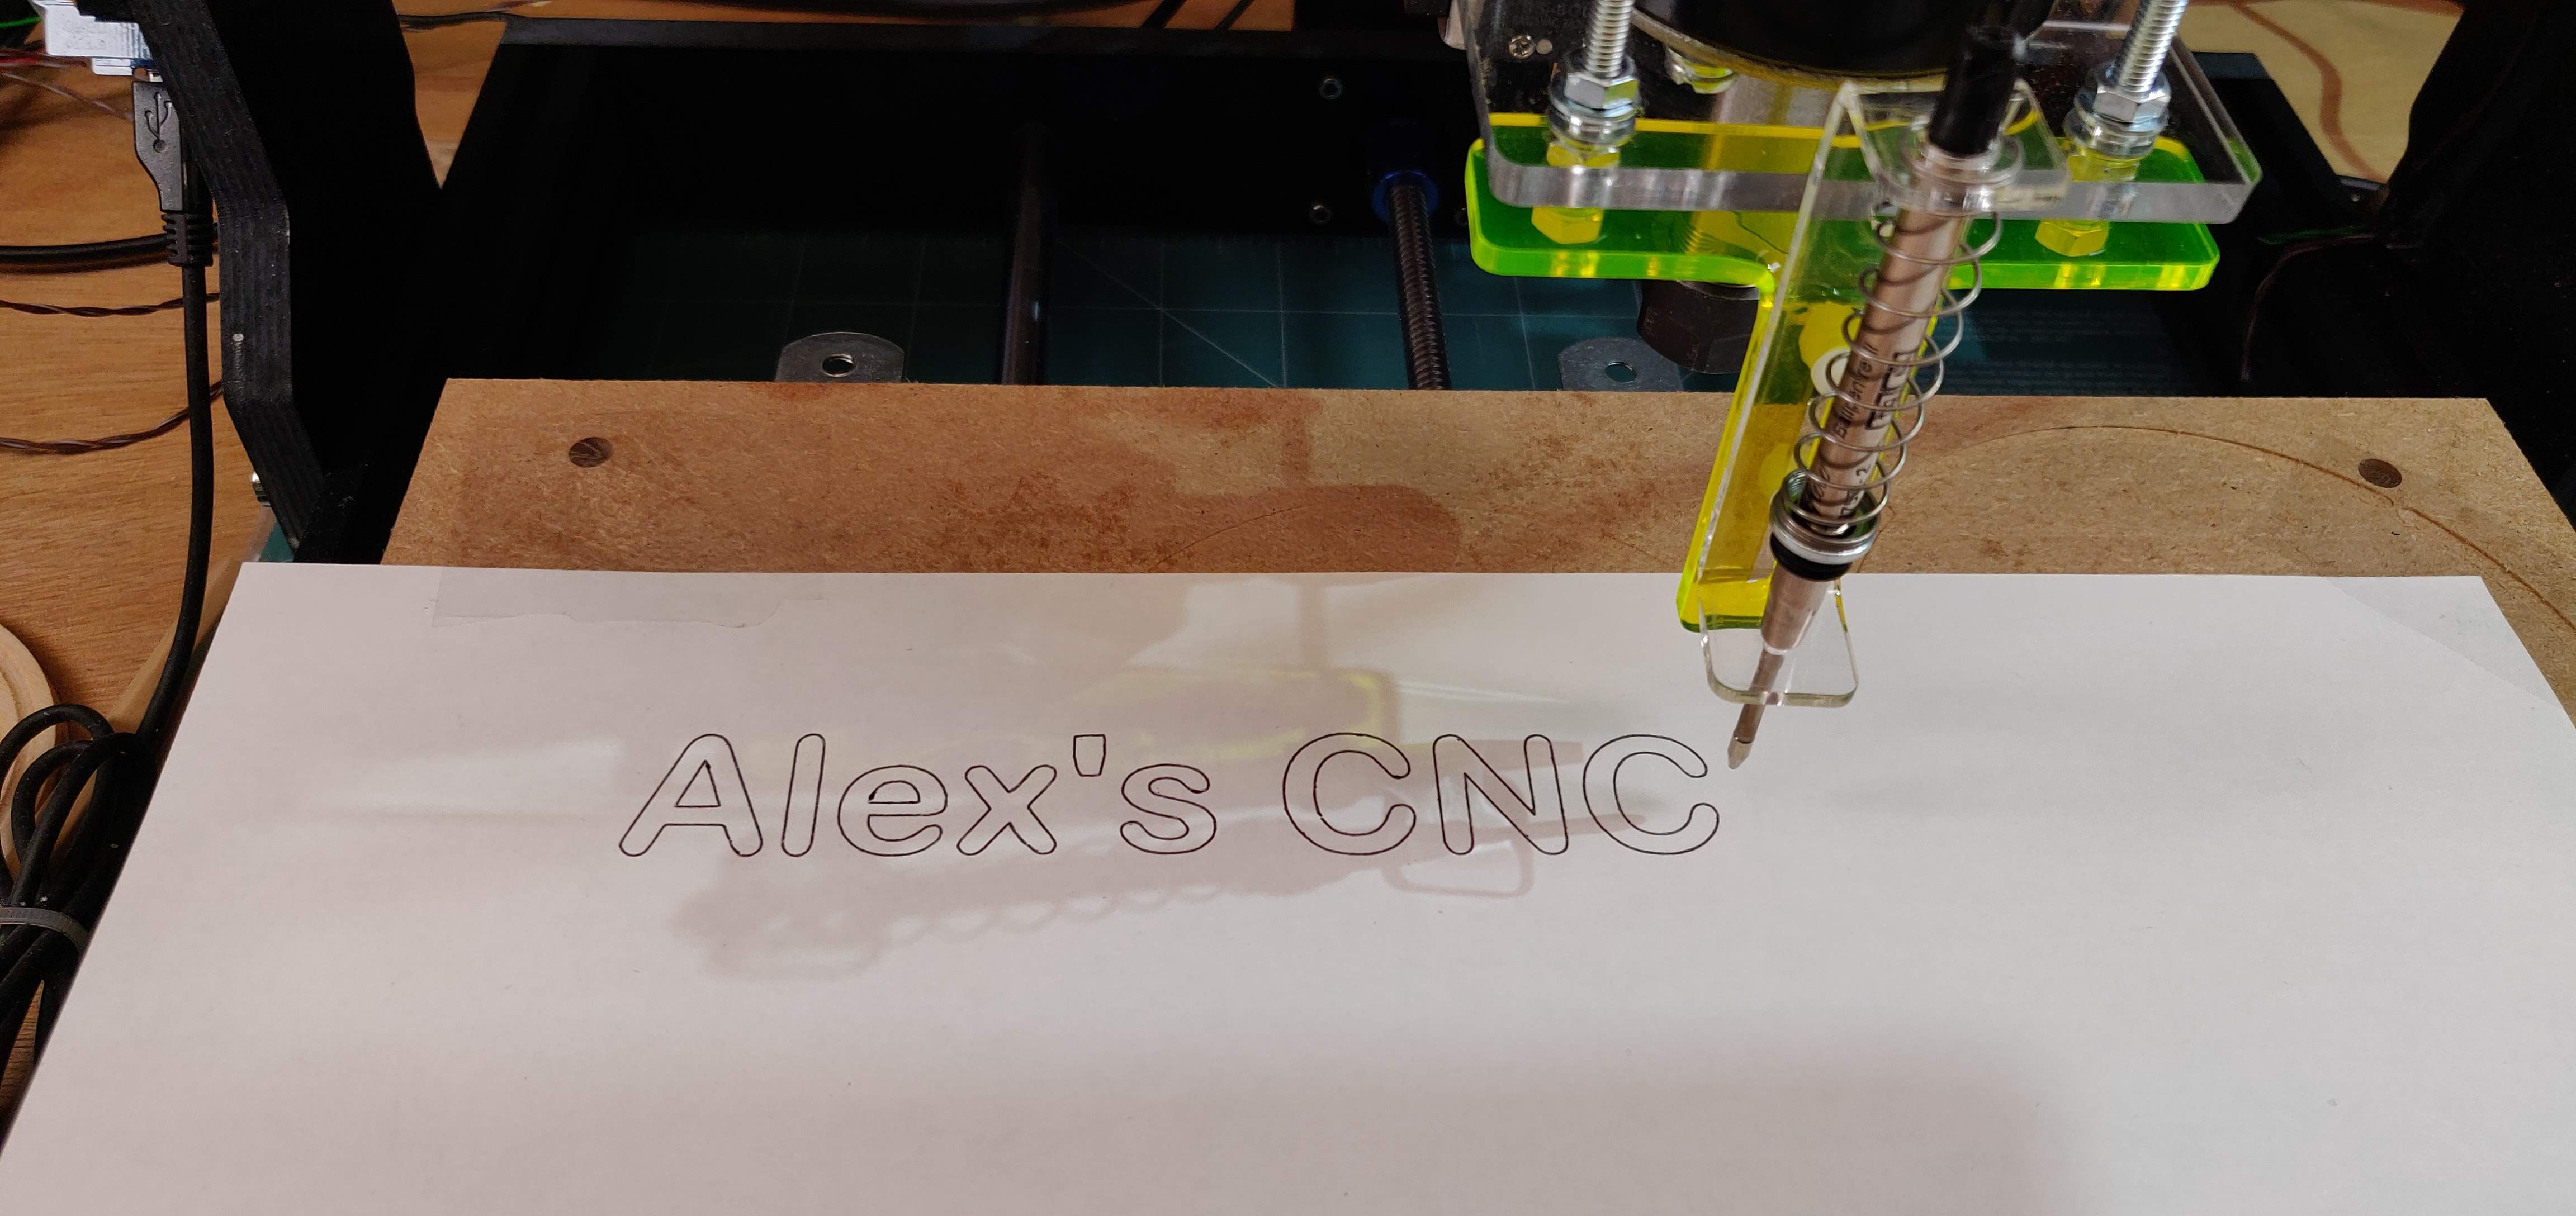
It also mounts on either front or side of the motor mount (the joys of symmetry). And with a cardboard backing to smooth out irregularities, you can get some quite nice results…

Geometric patterns like this are quite easy to do in CAD software

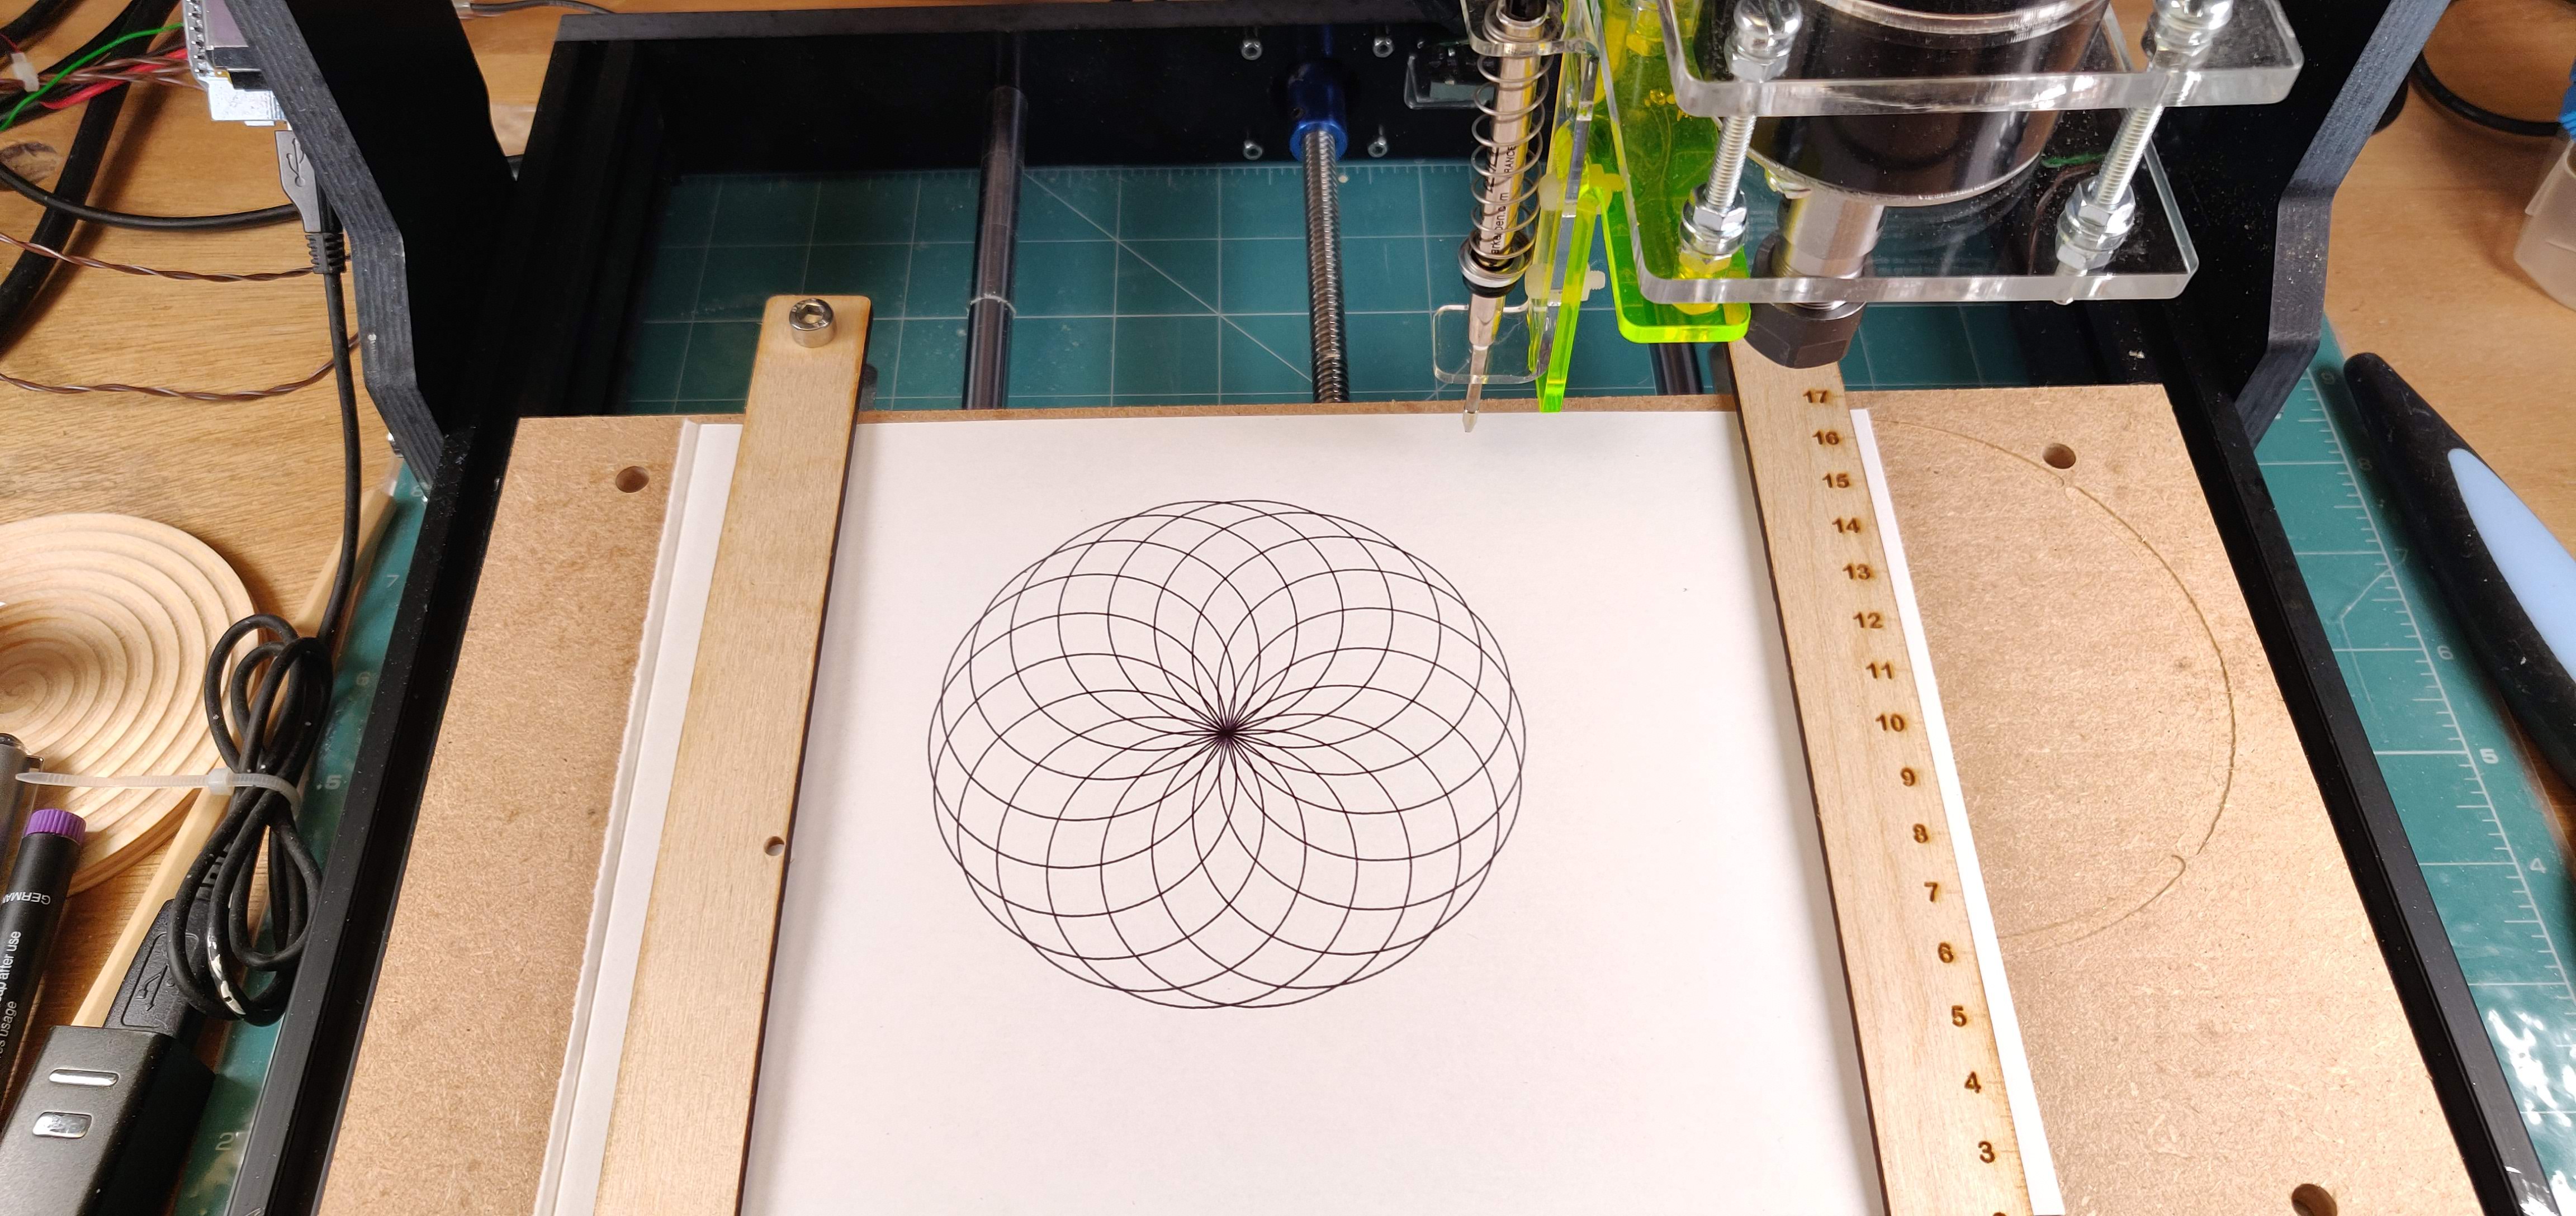
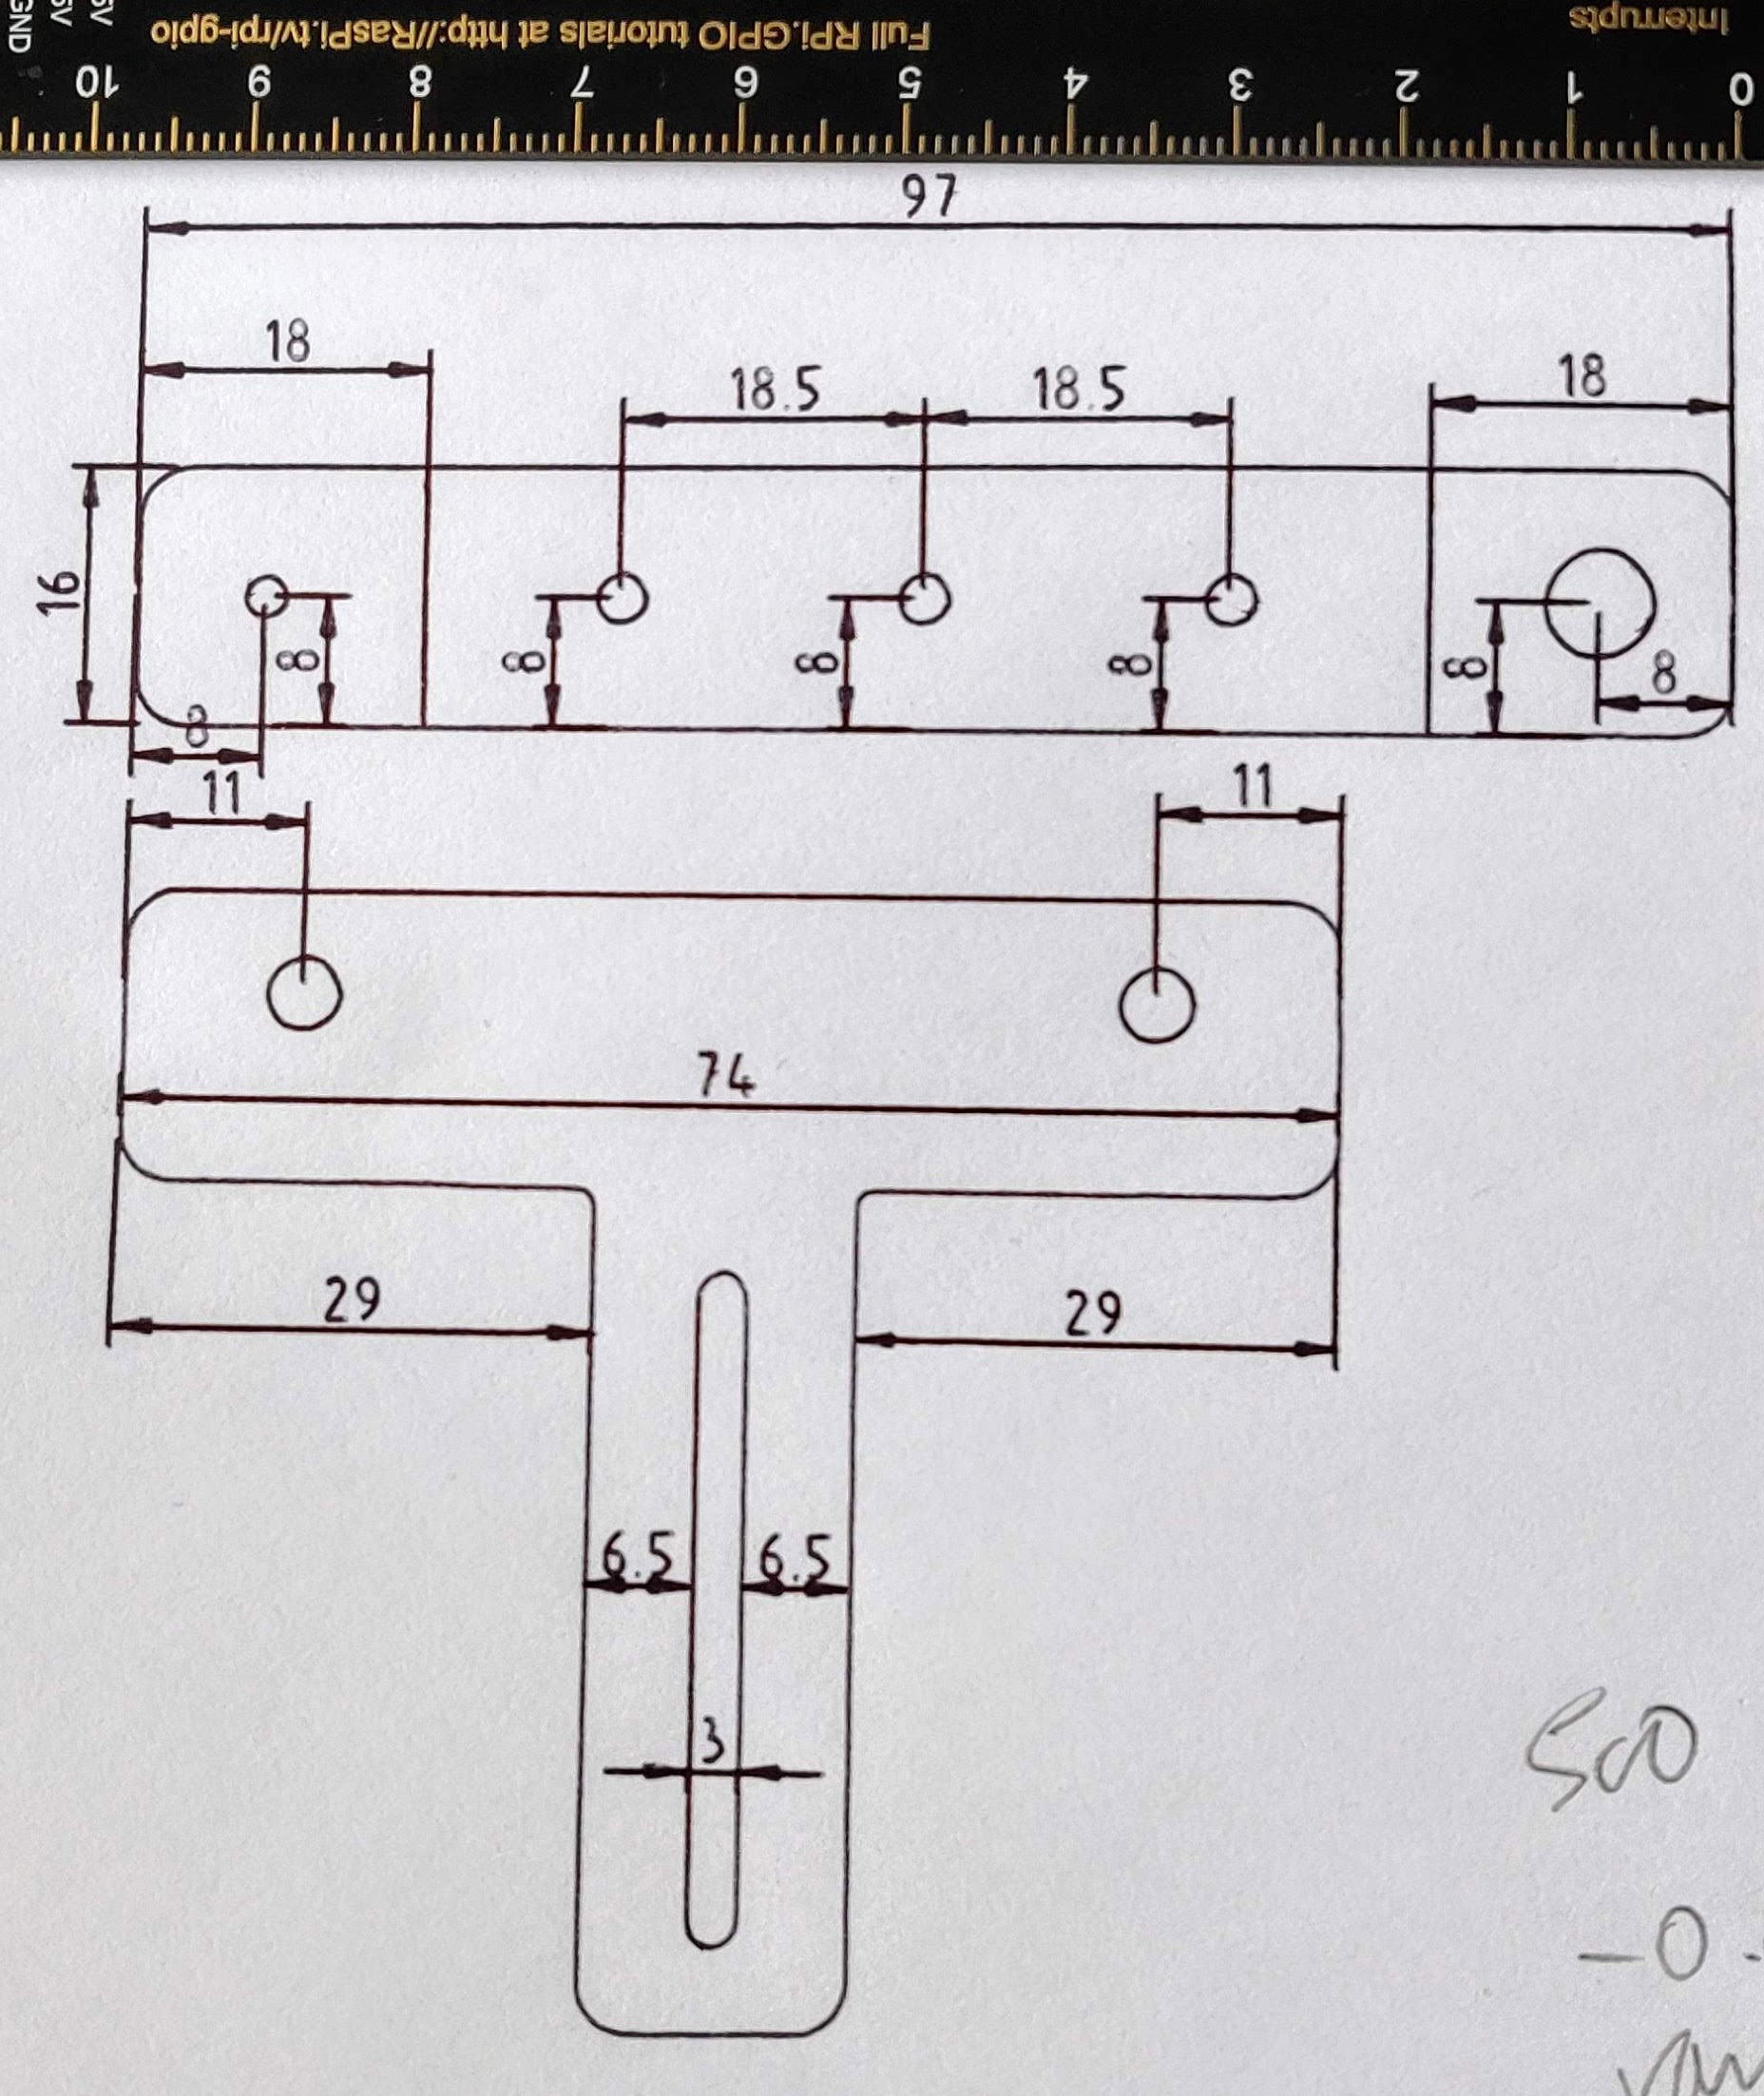
It can also do technical drawings from CAD software to perfect scale…

Technical drawing of the pen-holder

Next stop, I want to experiment with a ‘drag-knife’ attachment which supposedly would enable the machine to cut vinyl. But that’s for another day.

Nov 192020
 

Our perimeter wall has a step crack in that needs dealing with before it falls over and gets expensive. I was reading up on repointing walls and stumbled across a technique called ‘stitching’. They use it on buildings where a wall has cracked, so I figured it would be more than good enough for a perimeter garden wall.

Our fig tree has caused this step crack in our wall
If you can see all the way through, it’s not good

So wall stitching involves removing the old horizontal mortar spanning 50cm either side of the vertical crack to a depth of 30mm. Then you inject about 10mm of special anchoring grout and press a helical stainless steel reinforcing bar into the grout. Then you add another 10mm of grout, ultimately covering that with another 10mm of mortar to match the wall. you do this every 4-6 vertical courses of bricks sufficient to cover and reinforce the cracked area. Once reinforced you can then repoint any other bits that need doing.

Obviously tools are required. Diamond mortar raking disc.
And a 35x6mm diamond mortar rake for the verticals and depth

Some investment in diamond equipped toolage is required. The Diamond disc is incredibly fast and filthy dirty, but only hogs out 20mm. I needed 30mm so got hold of a rod shaped diamond bit for routing out the verticals and a bit deeper on the horizontals. Both of these go on the angle grinder.

Three slots overlapping nicely to span the step crack
Helical rod that will go in the slots to reinforce the wall

Once the slots have been dug out a quick hose-down to clean out loose bits and thoroughly wet the area. Then using a gun that’s similar to a large mastic gun, but better, squirt some grout into the slot, push it in firmly with a tuck pointing trowel, and press a helical rod into it…

Mortar/grout pistol. Very good if you get the mixture right.
Helical rod pressed into anchoring grout but not yet covered
Various tuck pointing trowels and a scraper

Then add more anchoring grout over the rod and smooth that in so the rod is properly embedded, creating a really strong composite structure. The anchoring grout goes off quite quickly, certainly a lot faster than regular mortar. I probably wouldn’t mix more than required for two bars in one session.

More grout on top and press it all in firmly with a tuck pointer to make sure the helical rod is embedded
Repeat until you’ve spanned the crack

Then allow to cure overnight (>=5°C) and cover with mortar that either matches the rest of the wall or, if you prefer, you could use some with some cement in that will last a bit longer. If it was the house I would be more bothered about colour matching. But it’s a perimeter wall, so I don’t give a toss if it doesn’t really match. What’s important is that the wall remains in place, opaque and functional.

Three slots made good with mortar (after 24 hours, still not fully dry)

After that it was time to make good the remaining cracks, so first up I had a good look at the mortar and marked the bits I needed to do dentistry on with the diamond disc and mortar rake. I used white paint to make it clear, so I could do all the messy work in one go and be unlikely to miss bits.

Marked up the areas to ‘hog out’ using white paint

This is the messiest job. Filthy dirty work. The disc is worse, but it’s so quick on the horizontals.

Cleaned the visor twice during the job
The whole lot after the carnage
Closer view after washing down the wall and letting it dry
19/11/2020 Next day after repointing the top few rows
20/11/2020 One gun’s worth of mortar into the bottom few rows. Middle bit still left to do
22/11/2020 Finished the middle bit on our side
26/11/2020 Neighbour’s side marked up for angle grinder work
26/11/2020 Neighbour’s side after hogging out dodgy mortar marked above

Pointed the neighbour’s side. Going to have a break now. Next thing will be the curved crack stitching, but might need to wait for a sustained period of weather above 5°C to start that.

28/11/2020 Morning’s work pointed neighbour’s side.
29/11/2020 The curved section from external side, marked up to show cracks (red) and where the stitching will go (teal). Stitching will go on the inner side.

Still to do (as of 19/Nov/2020)…

  • Finish the remaining rows on our side (DONE 22/11/2020)
  • Do the equivalent on neighbour’s side (DONE 28/11/2020)
  • Stitch the curved step crack on the other side of the fig tree (DONE 29/3/2021)
  • Repoint remaining cracks on curved section our side (DONE 1/4/2021)
  • Curved section neighbour’s side
  • Stitch a bit on our straight section that is leaning
  • Do some general pointing in places where it’s deteriorated

Time to Start Again (26/3/2021)

Forecast for the next few days is >5°C so want to get the curve stitched and secure so I can prune the fig tree. Hogged out four slots for the helical rods, which were bent slightly to fit the curves. Intending to grout these tomorrow morning, then mortar over them the next day…

Four slots on the curved section – pre-bent helical rods resting in place

27 March 2021 – got the helical rods grouted in and marked up where I will want to repoint. There’s a lot of hogging out to do, which will start on Monday if I get the grout nicely covered up tomorrow.

Green chalk marks show areas to repoint. 4 big slots now grouted, so the wall should now be secure.

28 March 2021 Got that covered up. If weather etc. allows, will do some hogging out tomorrow. At least now, it should be strong enough to not be at risk of falling. Obviously will be full strength once the rest of the repointing is done. That will likely take a while as it needs doing in quite a few places on both sides.

Covered the stitchings with mortar

29 March 2021 Lots of hogging out today. Did it all as it’s a filthy mucky dusty shitty horrible job I don’t want to do multiple sessions. Then I filled some of it, but there’s a lot more to fill over the coming days…

Lots of gaps to fill

30 March 2021 – did a couple of rounds of pointing. Most of the bit round the tree is now done.

1 April 2021 – And DONE!

Finished this side of the curve now. Will have to wait for another weather slot to do the other side.

Jun 302020
 

So, I currently find myself unable to cycle for a few weeks. I decided it would be nice to do some airbrush work. Nice light duty while I recuperate from RARP. I couldn’t think of a target, so picked something cycling related and useful, that I wanted anyway – a Carnac Kronus tt helmet. £40 from PlanetX. I don’t know how much impact it would have on my tt times, but they say it makes a difference. For now, let’s try to make it look nice and have some fun and maybe learn something in the process.

Carnac Kronus time trial helmet side view
Side view with clear visor
Carnac Kronus time trial helmet front view
Front view with clear visor

My initial thoughts were to paint the middle section (the raised part) fluorescent yellow. I tend to do that with all my helmets. So I started by masking off parts of it and flatting that central raised section with 800 grit wet ‘n’ dry. I also sanded off the logo from the front, otherwise it would show through as an embossed image.

Flatted central section
Logo No Go

Having done that it was time to mask it all up and spray on a couple of coats of white primer. Whenever spraying over something dark, a white primer is a good idea or you’d need a large number of coats of colour and it would still not get quite the right effect.

2 coats of white primer

Then it was time to think about the sides. I wanted some sort of graphic or artwork on the side. Singularly lacking in drawing ability, I took to the internet to find some sort of cartoon icon/graphic of a bike or bike with rider that might lend itself well to stencilling. I found something I thought might work and tweaked it so I could laser cut the stencil. Having cut it in ‘suspension file cardboard’ I was now at this point…

White primed helmet with stencil

The idea here is to line up the wheels with the “carnac” text as if it’s the road. I quite like the minimalist style of the graphic and it lends itself very well to stencilling as there are no bridges required. To be sure the concept would work, I made a mock-up of the sprayed image on black cardboard (the helmet visor box was perfect for this).

White primed helmet with stencil
Mock-up for proof-of-concept

I was happy that this was going to work, but I was also having second thoughts about the fluoro yellow. The white primer looked pretty good and my Roubaix is black and white, so I decided to put a few coats of white top-coat on instead of fluoro yellow. So it was remask it all, spray 3 coats of top-coat and then after waiting overnight, 3 further coats of clear satin varnish, both to seal it in and to “save” that layer of work in case I do anything over the top that then needs to be reworked.

White top-coat
White top-coat

Before committing to the logo, I wanted a final sanity check, so taped a logo on each side to see what it looked like. Obviously I needed to wear it, with the mirrored visor and take a selfie outside to see what it might look like…

Mock-up or cock-up? It'll do!
Mock-up or cock-up? It’ll do!

Yeah. That’ll look quite good, methinks! So let’s get on with the graphics. Stencils-away. It turns out that putting a flat stencil onto a compound curve is “interesting”. I had to slit it in a couple of places to make it lay flatter. Used 3M repositionable spray mount adhesive. Bloody expensive, but it’s about the best there is for this job. Then masked around the stencil to avoid overspray.

All stencilled up and ready to spray

Sealed the stencil with satin varnish, then a couple of coats of white primer, followed by 3 coats of white. Which takes us to this point…

Quite pleased with that, little bit of tidying needed

So that’s what it looks like on each side (mirrored on the other side so both riders are riding the same way I will be). The sides still need my name on the ‘ear-flap’ part below the ‘ac’ of the ‘carnac’ lettering. For sheer simplicity, inertia, lack of imagination, laziness and consistency, I decided to use the same lettering (modelled on the SPECIALIZED font) I use on my bike and other helmets for this. So I cut some new stencils on the laser cutter using masking tape.

Name stencils in masking tape

Then sealed with clear satin varnish, primed with white primer and top-coated with fluoro orange, to end up with this…

Are we nearly there yet?

Still need to seal the name down with a border of clear satin varnish or it will peel.

Sealing around the logo with clear satin varnish

So, we’ve got the large central white band, the bike and rider graphic riding along the Carnac lettering and a fluorescent orange name. That would probably do. And yet…

Almost done
Pretty much there – unless…

…I’m thinking I’ve got this huge piece of white real-estate in the middle that might need some more tweakage. Some shapes/stripes/graphics or something else to embellish it further. Maybe the club logo? Or even a pair of eyes? We’ll see. I’m going to pause it there until the next decent idea arrives.

All that lovely white real-estate waiting to be used

After the Pause

So I was thinking about some kind of cartoon character for the front. Maybe Donald Duck riding a bike or something like that? Unfortunately, I took a look at the front and we’ve got those 6 air vent lines which will look like black lines. So I decided to try and make a cartoon character of my own that would incorporate those 6 lines. All I could see in my head was a cartoon alien, so I looked up a few for reference, then printed out a photo of the helmet and started drawing on it. Drawing is one thing I freely admit I’m not very good at.

The outer vent lines help define the sides of the face and the inner ones define the outside edges of the eyes. Funny shaped eyes, but then it is an alien afterall. So after that, I had these ‘drawings’…

First two drawing attempts – liked a couple of bits from each

So, having a basic idea allowed me to attack the problem on the computer, which gives me some tools to overcome my lack of drawing ability. (And would be needed for stencil cutting anyway.) Creating this alien took pretty much a morning piddling about with photoshop and inkscape, but it seems to camouflage the air vents really well.

Cartoon alien
Using the vent holes as black lines

On the computer, it looks pretty good. Now it was time to cut stencils on the laser cutter. I used paper this time as the compound curve issue is a bit less of a problem with a thinner medium. Still had to snip it a bit in places though.

Laser cut paper stencil

Scaling is a Challenge

The distorted perspective of a working with an angled photograph of a compound curve (whilst designing in 2d) meant that it was a bit of a challenge to get the scale and dimensions exactly right. I scaled it for width, which meant that the height wasn’t exactly right. But with a bit of judicious snipping, the stencil was made to fit. The immovable objects, obviously being the vent slots. Everything else is somewhat flexible.

Once a stencil was made, I thought it would be a good idea to do the yellow ‘face base’ colour first. So I masked off the white highlights in the eyes, so they would stay white, and sprayed the majority of the face fluorescent yellow. (Had to get some in there somewhere. And who says aliens have to be green?)

Yellow face base with masks for the white eye highlights

Once dry, masking comes off (apart from eye highlights) and we re-mask for the black layer, which includes all the facial features and the outline which encompasses four of the ventilation slots…

Remasked for the black layer

It’ll be interesting to see how it turns out. I’m toying with the idea of doing some sort of ‘differential topcoat’ with satin for most of it, but maybe gloss for the eyes? Not sure how that might work.

Couple of black coats laid down

Once the 3 black layers were dry, the masking was peeled off and I tried it on with the mirrored visor…

Yeah – that works!

I have to say I’m very pleased with that. It looks pretty much as I thought it would, only better. There’s very little stencil bleed. Have I finally hit on a good technique?

Below is an image of side by side design concept (left) and actual implementation (right). It’s pretty close. Although it looks as if the angle of the shot is slightly different.

Left: Photoshop design. Right: Implementation for real.

What Next?

So when that’s all properly dried overnight, it’ll be time to protect it with a couple of clearcoat layers. There’s still a bit of space at the back, but I haven’t got a concept for that yet. There’s the awkward ‘tail’ shape to work around. Reminds me a bit of a lizard or crocodile tail with the spine running down it. Or even a cartoon stingray. But that’s an issue for another day…

Cartoon Stingray it is then

After much prevarication and a few days off I ended up choosing the cartoon stingray I’d found on the first day. The graphic needed some tweaks to make it a good fit for the helmet. I straightened the tail and scaled it to fit.

I cut stencils in paper again and used 3M remount as before.

Lots of layers on this one

This design required several layers as there are several colours. It was quite complex and tricky, but the spraying side of it went quite well. Some of the detail was brushed, and some of that part went a lot less well. Filling in the green part of the eyes was fine, but the detailed fine lines around the gills and the “waving hand” are a bit wobbly for my liking.

Also, stencilling and brush-painting is a recipe for horrible bleeds. I had to scrub and redo the blue spotted area on the “waving hand”. Some of the fine lines around the mouth also needed some cleanup for this reason. These are things to learn from the exercise.

After spending most of the day on it, it finally looked like this…

A blue-spotted ray, cartoon style, waving at us

Still needs a bit of tweaking and some clearcoats, so we’re not ‘there yet’. Another couple of days required to get to that point.

OK. I think we’re done…

Jun 042020
 

’twas brillig and the cyclist’s toes
Did spin and bimble in the rain
All flimsy were the Shimanos
And the time trials of pain

Beware the right-angles my son
The hedge that hides, the stones that slip
Beware the wetness on the road
Can make you lose your grip

He took his aero-bars in hand
Long time to Chesterton he rode
After mile three, eventually
’twas time those legs to load

And as he wound the power out
The tractor-beast, with teeth attached
Came hurtling round the roundabout
Making a noise, unmatched

One-two, one-two “I WILL pass you”
The tractor-beast went loudly past
And in its wake, all he could make
Was a time not so fast

And hast thou took the KoM?
“Not quite” he said “It was too tough
Precipitous day blew me away
My Watts were not enough”

’twas brillig and the cyclist’s toes
Did spin and bimble in the rain
All flimsy were the Shimanos
And the time trials of pain